Mig Welding Overhead

Mig welding overhead is not all that different from migging flat on the workbench.
It seems really difficult at first but, its really just a matter of getting comfortable and paying attention to a few key things.
So just what are these 3 things that make the most difference for mig welding overhead?

The best advice I can give you for welding overhead with Mig is to pay attention to these 3 things:
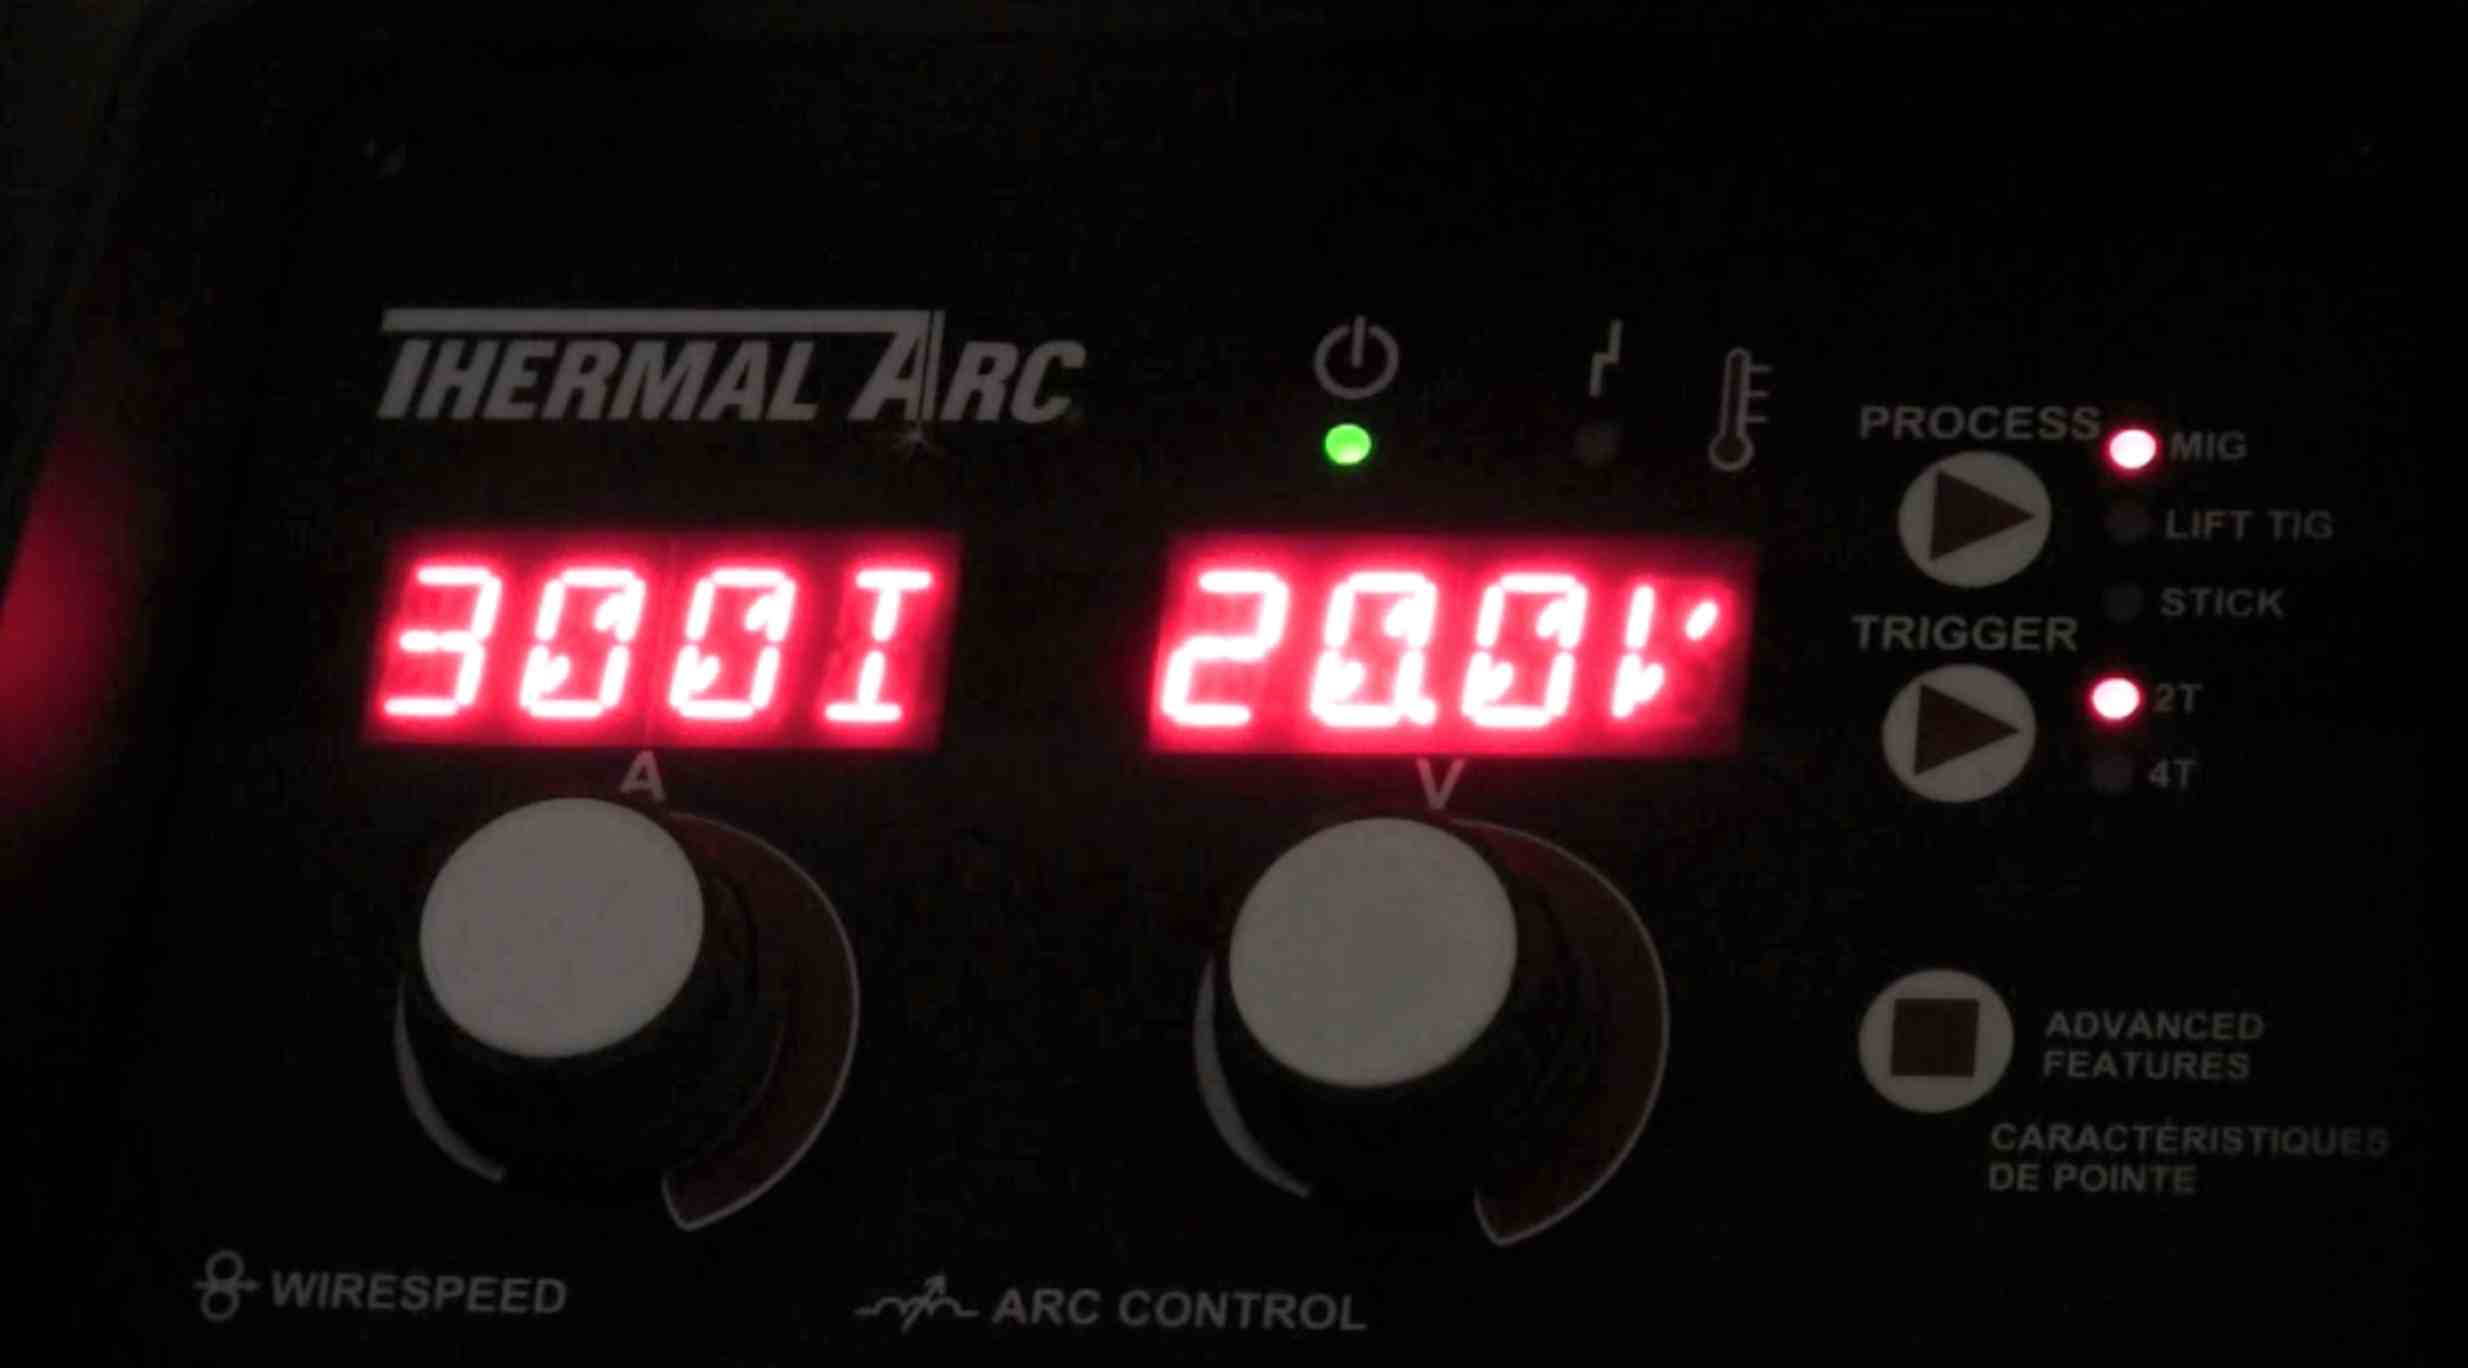
1. Make sure and have the machine set hot enough...I use the same settings I would use welding flat. 20-21 volts works pretty good for tee joints, but would probably a bit too hot for an open butt root.
...for this video I used 20 volts and 300 ipm using .035" er70s6 wire
(thats 7.6 meters per minute using 0.9mm wire)
2. Make sure your stickout is right...Stickout being the distance between the arc and the copper contact tip. Make sure the contact tip is at least flush with the nozzle and preferably protruding about 1/16". Even if you have to trim the nozzle to get this it is well worth it..... and keep the stickout to 1/2"--3/8"...this is really important.
3. keep the torch angle to a minimum. Dead nuts straight in is good . if you are welding an open butt v groove weld, use about a 5 degree drag angle for the root...and a 5 degree push angle for the fill passes. Stay on the front of the puddle all the while keeping your stickout no more than 3/8"
The 3 problems I see most often on overhead mig is too much stickout and too much torch angle..number three is not welding hot enough. Using a long stickout along with not enough amperage just makes the weld pile up high.
Using enough amperge, good stickout, and correct angle lets the arc force punch the weld and helps it flatten out.
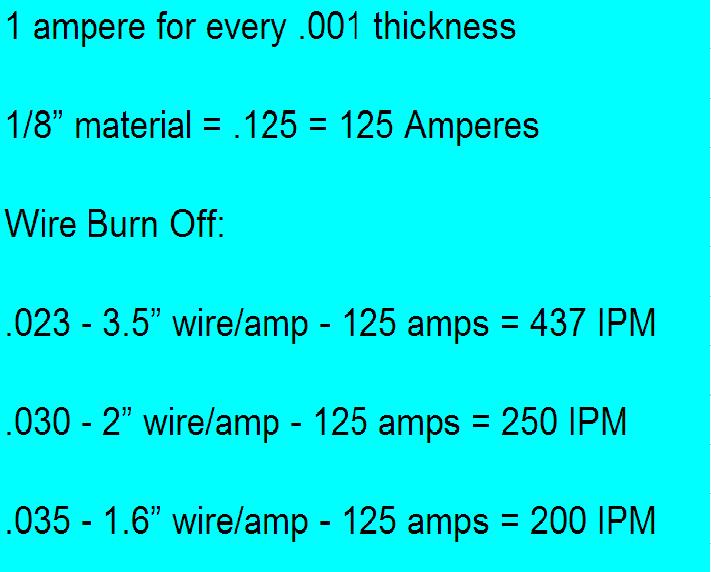
The Rule of thumb Wire feed settings table below are strictly for short circuit mig welding steel. The chart can help get you in the ball park but just keep in mind once you go over about 3/16" - .190" ( 4.8mm) thick. the formula is too hot.
for example, if you were to use the chart for settings for 1/2" thick steel, that would be .500" or 500 amps. for .035" wire, that would be 800 ipm of wire speed. Most machines dont even go that high for wire speed.
That said, this mig welding setttings chart works OK for 3/16" thick steel and thinner
watch more mig welding videos
The Devil is in the details...other little devils that make a difference for mig welding overhead
getting a good ground is really important for mig welding.
Actually a good ground is more important on mig than most other processes.
The reason is that with mig, that wire just keep coming no matter if you lose your ground for a split second....that is where a lot of misfires occur on starts....and also stutters mid weld.
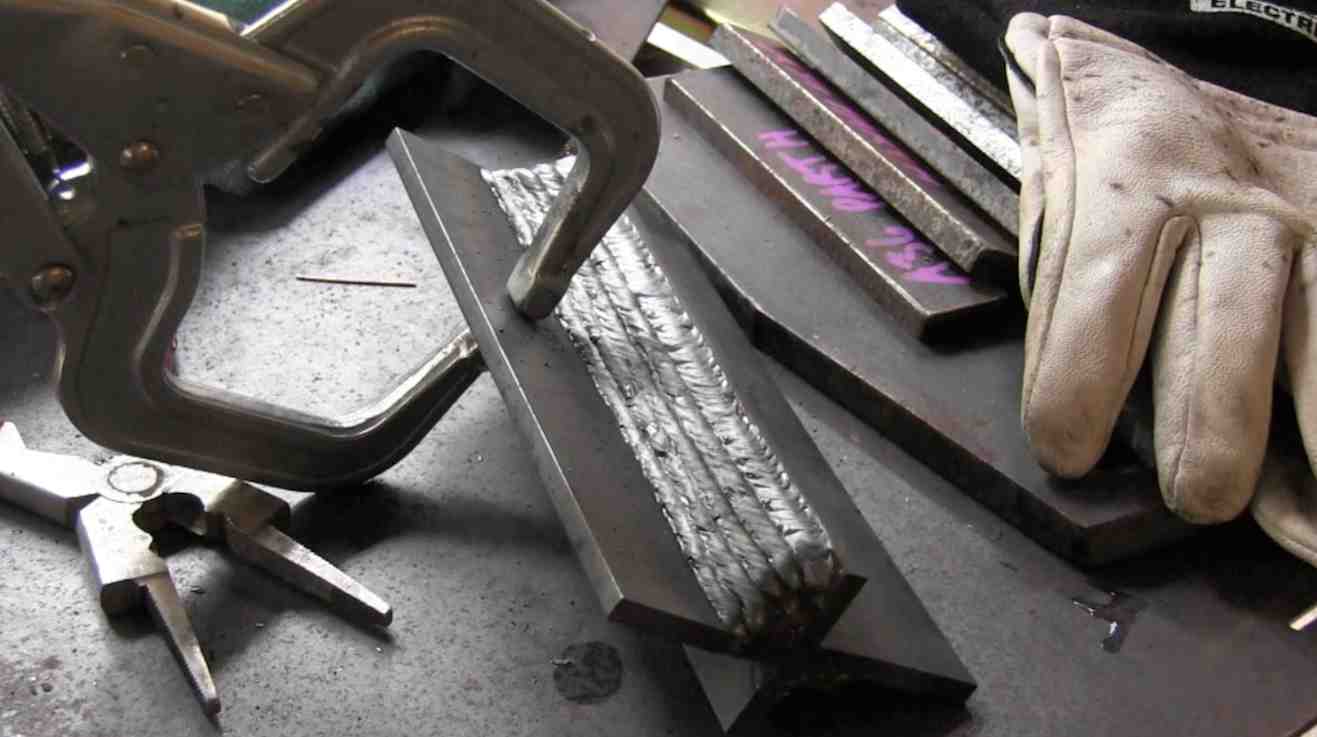
In the video, you might have noticed that I have the ground clamped directly on the tee joint.
Even then, I had a few grounding issues...a few stutters.
When I ground off a spot to clean bright metal ...for the ground clamp, things got better.
(I will demonstrate some better ground clamps in an upcoming video.)
change that contact tip every now and then
when a contact tip gets really worn out, it no longer transfers welding as current well as a new tip.
Contact tips are fairly cheap so its good practice to change them when you notice bad starts, stuttering, or wandering arcs.
How often should you change the liner?
I will be honest, I usually wait until I notice a problem feeding the wire before I change out a liner.
But if I am doing coded work, or something that is very important, and I cant remember the last time I changed the liner, I change it.
Liners differ from one mig gun to the next but most heavy duty machines I have used have a spiral steel liner. ..kinda like a lawnmower throttle cable.
It can get caked up with shop dust and even the copper from the welding wire can build up to the point where the wire does not feed smoothly.
I remember talking with a welding engineer once who was in charge of cladding boiler tubes with inconel 625 wire.
He had been bitten in the butt once too many times and so made a policy of changing the liner every time a spool of wire was changed.
that might sound like a knee jerk reaction but is does serve to illustrate just what a big deal changing liners can be.
visit the weldmonger store

Would you like to get free welding videos in your inbox every week?


Tig FingersThe Real and Original TIG Finger® and XL model
Stubby Gas Lens and Pro TIG kits
2% Lanthanated, CK LaYZr, Purple, more
Our Weldmonger Stubby Gas Lens kit is the Best


