
Welding Tips for Tig, Mig, and Stick
The best way to find information on this website is to use this search bar


 |
 |
 |
This page is about key welding tips for tig, mig, and stick.
- How to hold the torch for welding on round tubing,
- How to walk the cup on socket welds and how to freehand using a Tig finger.
- How to use aluminum backing for filling holes or even for tig welding razor blades
- How to tig weld backwards on the edge of sheet metal..and much more
Welding tip #1 ..preloading the torch
For Tig welding on round tubing like saddle joints, preloading the tig torch lets it rotate to maintain a favorable electrode angle.
Simply rotate the torch in the opposite direction you want it to twist while welding and then as you weld, gently loosen your grip to allow the torch to rotate.
it takes a bit of practice but its worth learning.
welding tip #2
Walking the cup is a great way to weld socket welds.
but sometimes there are things on the way and you have to prop.
and yes ...this is a shameless plug for my products...the tig finger and tig finger XL. Now replacing "sliced bread" as the benchmark for all things good.
Welding tip #3
save all the thick blocks of aluminum you can to use for chill blocks and for backing for sheet metal as well as for filling misdrilled holes.
tip #4
Sometimes you need to weld on an edge to build up a part to restore dimensions.
this is done in the aerospace repair industry routinely for weld build up repairs on blades.
Welding backwards can really help to profile bead height...it also helps shield the weld for subsequent passes when multiple weld passes are required.
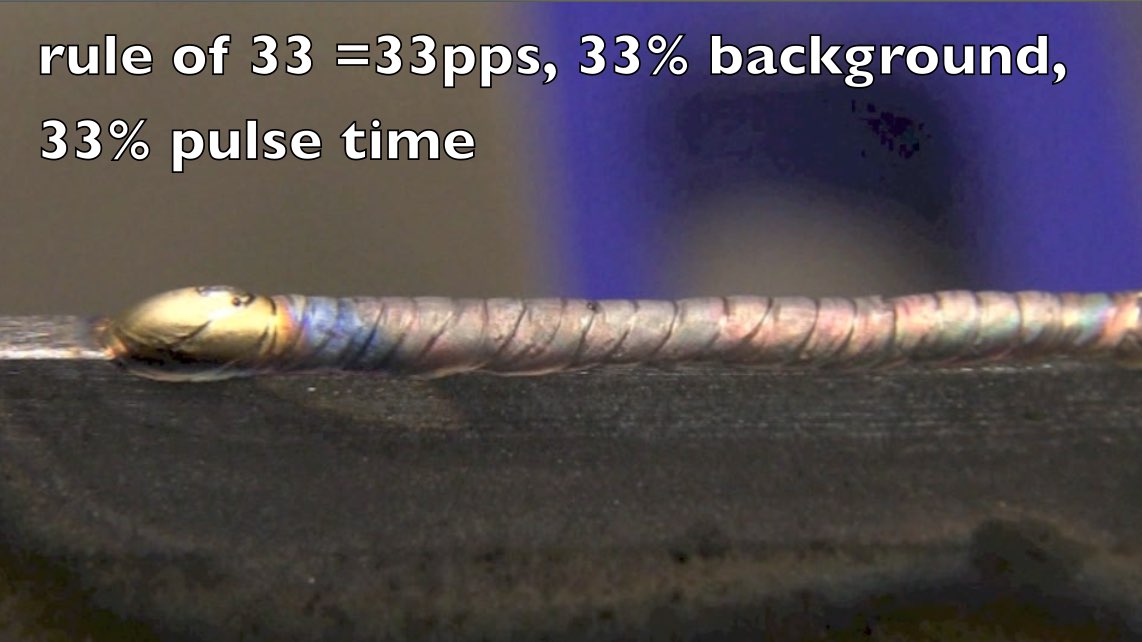
it also helps to use my "rule of 33" which is simple way of remembering pulse settings that are a good starting point for edge welds.. using 33 pulses per second, with 33% background current, and 33% pulse time...works especially weld for edge build up.
tip #5 using backing
Stainless steel pipe welds require purging to avoid granulation of the root pass. (also known as sugaring).
But some stainless welds can be done using aluminum or copper backing that traps argon, serves as a heat sink, and also helps cast the weld and prevents it from drooping on the back side.
tip #6 use the step and pause technique for tig welding
Using the step and pause method for tig welding means that you move the arc along the joint and pause while you add filler rod.
Some welders prefer to move the torch at a steady rate and just dab filler rod along the way.
not a thing wrong with that but the reason I like the step and pause technique is that my torch hand pauses while I concentrate on adding filler metal and I sharpen less electrodes using this method.
tip #7 Dont lower the amps for overhead stick (well , not much anyway)
for Stick welding overhead, a common mistake is to lower the amperage from normal settings for flat and horizontal out of fear that the weld will droop.
You need enough amps so that when you hold a nice tight arc, the rod doesnt stick.
tip#9 Use same settings for overhead mig as you would for horizontal or flat
Same concept for short circuit mig welding. Use the same settings for overhead that work for flat and horizontal but make sure to remember KYSS.
(Keep Your Stickout Short)
tip #10 pad those beads and hold a tight arc
padding beads is some of the best stick welding practice you can get.
While you are running all those vertical uphill beads, keep that arc tight.
if it sticks, increase the amps enough that the rod doesnt stick when you hold a tight arc length.
..and For horizontal stick welding, point the electrode upward a few degrees to avoid undercut.
Tip #11 the 3 things every new tig welder seems to do wrong.
there are 3 main things that new tig welders seem to do wrong.
and if you can correct these 3 things early on, the training goes better and faster.
- too much arc length
- too much torch angle
- not shielding the hot tip of the filler rod.
The ripples in welds are freeze lines.
The stacked dimes look is popular but not necessarily the best way to tig weld.
you can tighten up ripple spacing by adding rod more frequently.

Would you like to get free welding videos in your inbox every week?


Tig FingersThe Real and Original TIG Finger® and XL model
Stubby Gas Lens and Pro TIG kits
2% Lanthanated, CK LaYZr, Purple, more
Our Weldmonger Stubby Gas Lens kit is the Best


