
Welding Aluminum Pie Cuts for an Intake
Ever tried a small #5 cup on aluminum? We have them for your torch at the weldmonger store


This Video is a collaboration between Roy Crumrine (Crummy Welding LLC) and Myself.
Its always fun working with Roy and I always come away with a few good tips to share.
In this video you will see...
Tack Welding, positioning the piece using blocks, maintaining good torch angle while welding on round tubing, tig welder settings and more...

see more tig welding aluminum videos or go to the main TIG welding page
  |
  |
This article about Welding Aluminum Pie Cut joints was written by contributing author Roy Crumrine.
(Roy did the welding on the actual part)
Roy's business is Crummy Welding LLC located in Largo FL.
Check Roy out on instagram @crummywelding
This job was for a company called S1 Built in Clearwater FL who specializes in custom work on imports.

Tack Welding the aluminum pie cuts
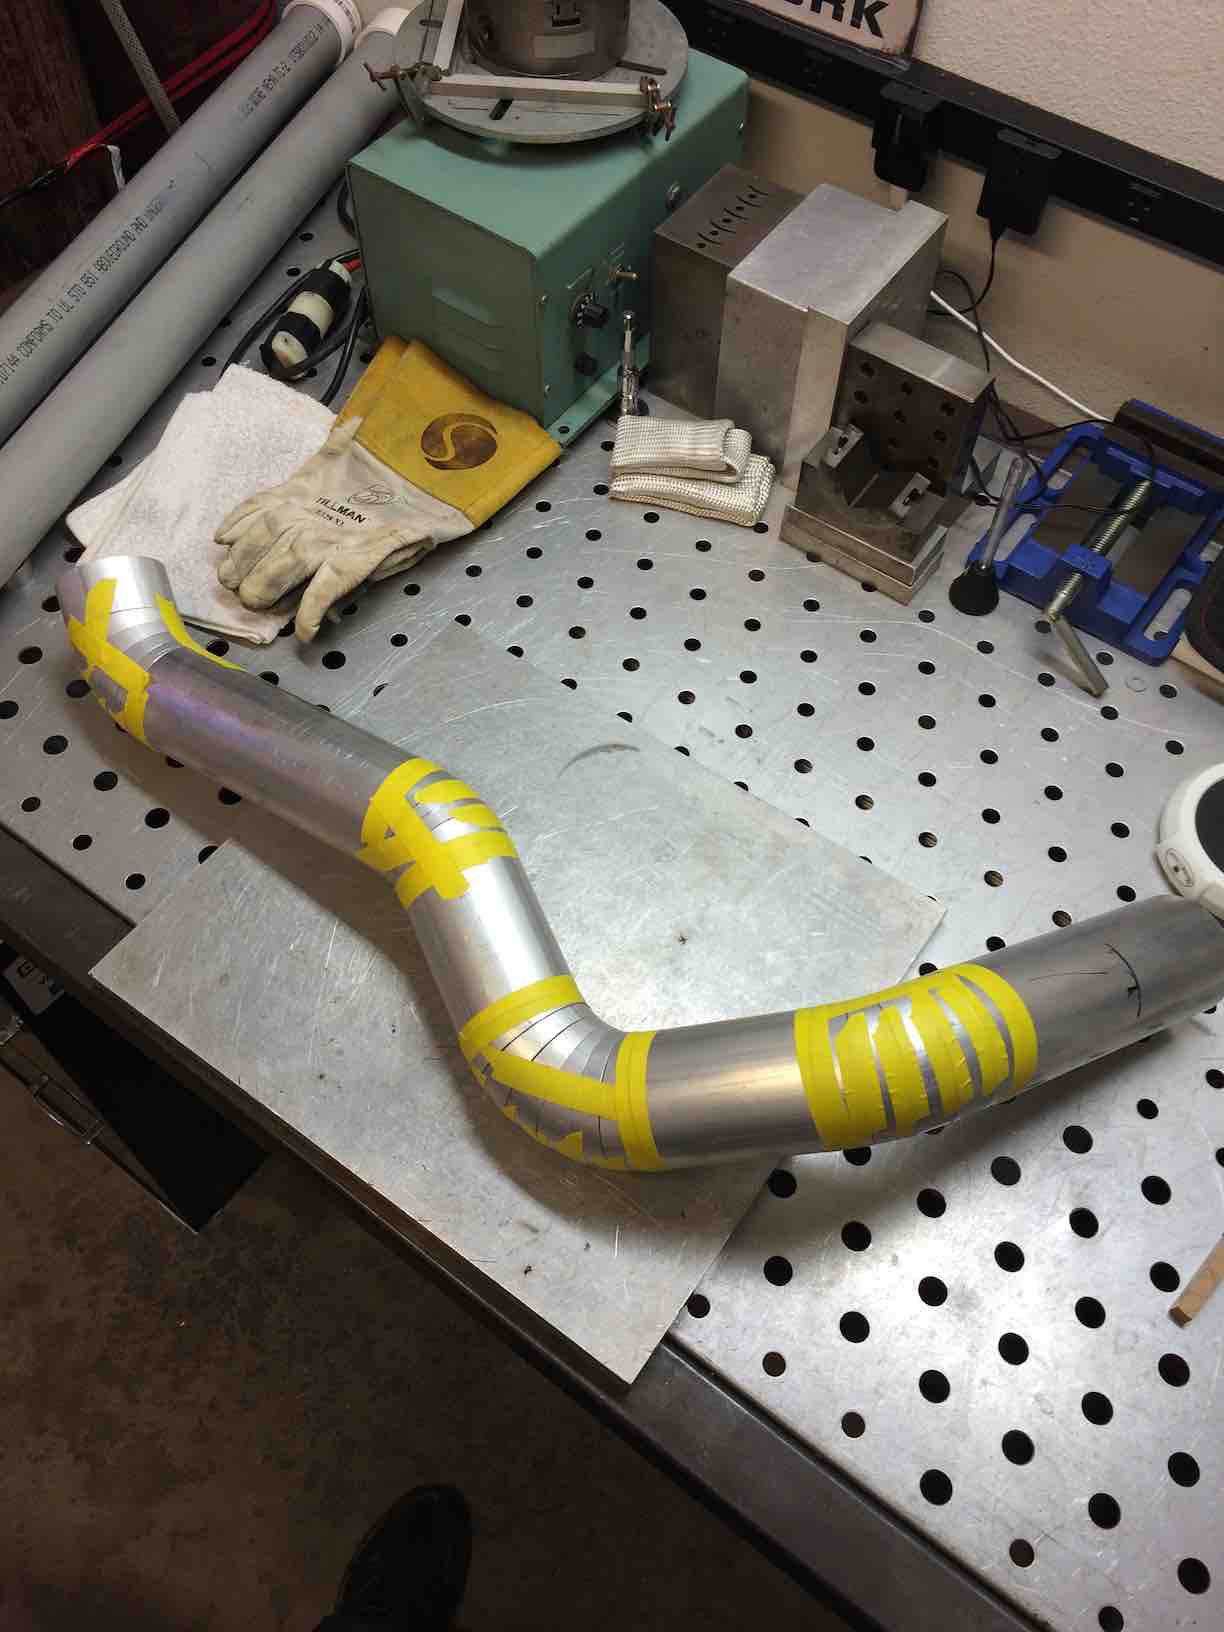
This pie cut intake was taped together using the actual car for fitup...
But then the part was brought to Roy to weld in his shop away from the car. So it was important not to lose the location of each joint.
The most important outcome of this job is that each end of this duct fits properly. Of course the welding should look good, but if the part doesn't fit the car, the piece is of no use.
This involved removing the tape just far enough to tack the parts and then removing it more after it cooled a bit to limit the sticky mess from the adhesive.
machine settings for this aluminum tubing job
Normal aluminum stuff... #5 cup, 3/32 2% Lan tungsten with about 1/4
stick out, Ac Fq set to 220-240 on the dial, and 40-50% Balance on the
dial. (Everlast 250ex machine so dial is set to % EP) 1/16" 4043 filler wire was used for the full pipe.
cleaning
After all tack welds were done to preserve the locations, I used acetone to wipe down everything as much as possible.
Unfortunately, there were a
few spots that had tape residue or grime between the pie cuts that I
could not clean or see before welding... Everything would be Going along great then oh
crap!... You know how that goes I'm sure. I used a new wire brush to
clean all the seams before acetone wiping to help break that oxide
layer.

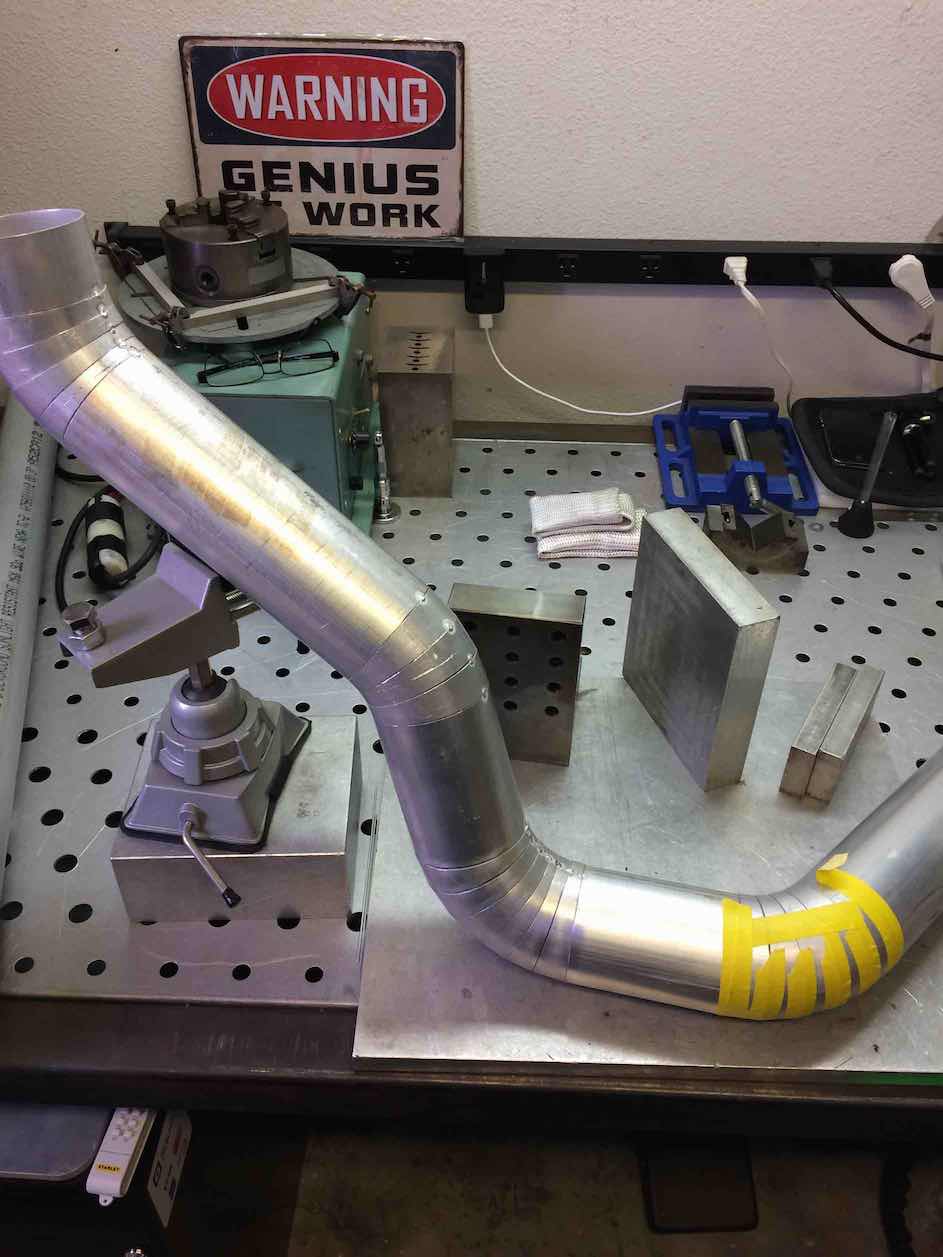
Blocks for holding the piece while welding:
This is when it's handy to have all the crazy sized blocks and angle blocks. I do have an adjustable hobby vise that would have been Great for this but it didn't open up enough for the 3" pipe! Crap!! (might need to look into a little larger one of those...)
Really, figuring out how to hold the pipe in place so that it would be stable and also giving me the right angles is what took the longest to set up.
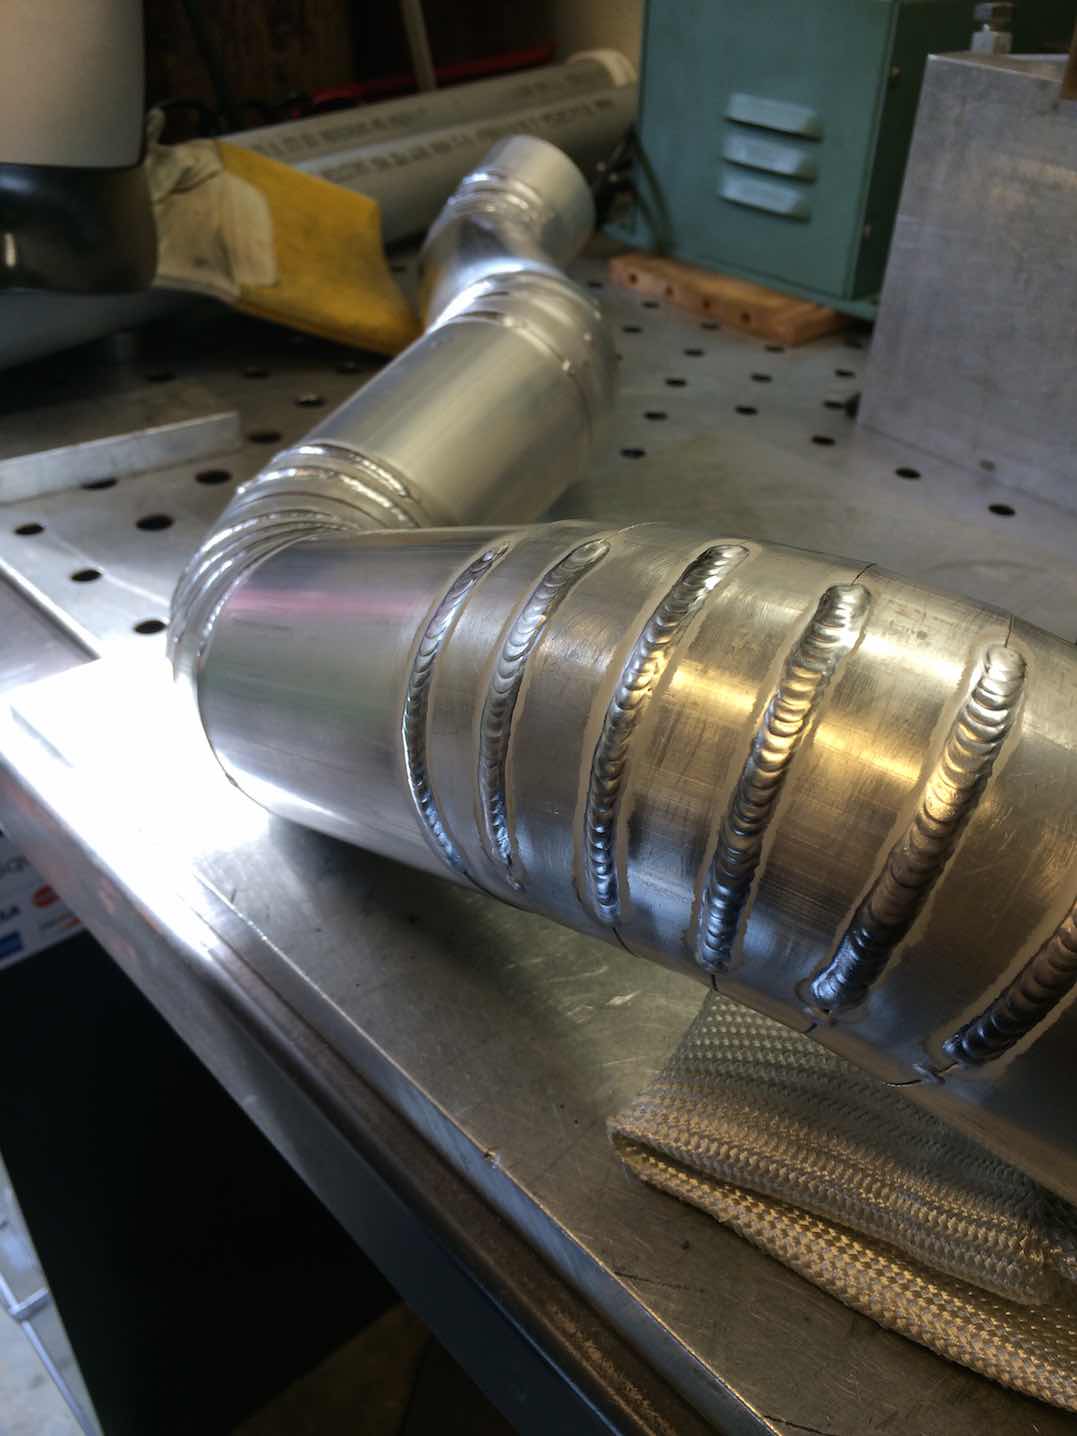
Welding it up:
After getting the pipe set, I tried to jump around to even out the heat and the pulling of the overall part. I could only weld 2 or 3 weld sections per pie cut before having to let it cool and readjust the part.
I kept all the welds going in the same direction for each bend to keep the pulling going in the same direction and also to keep the bead profile the same all the around the pie cuts.
There was a mounting lug that was welded onto the pipe but just had a few small 3/4" tacks and it that lug was hidden from view on the vehicle.
Below is the part installed on the car all polished up and looking good.


Would you like to get free welding videos in your inbox every week?


Tig FingersThe Real and Original TIG Finger® and XL model
Stubby Gas Lens and Pro TIG kits
2% Lanthanated, CK LaYZr, Purple, more
Our Weldmonger Stubby Gas Lens kit is the Best


