
Miller Multimatic 220 AC/DC

Have you ever tried lowering the wire speed to do the "mig like tig"stack of dimes technique?
For this article and video, i decided to test lower wire feed settings on outside corner joints one 3/16" (4.8mm) and 1/4" (6mm) thick steel.
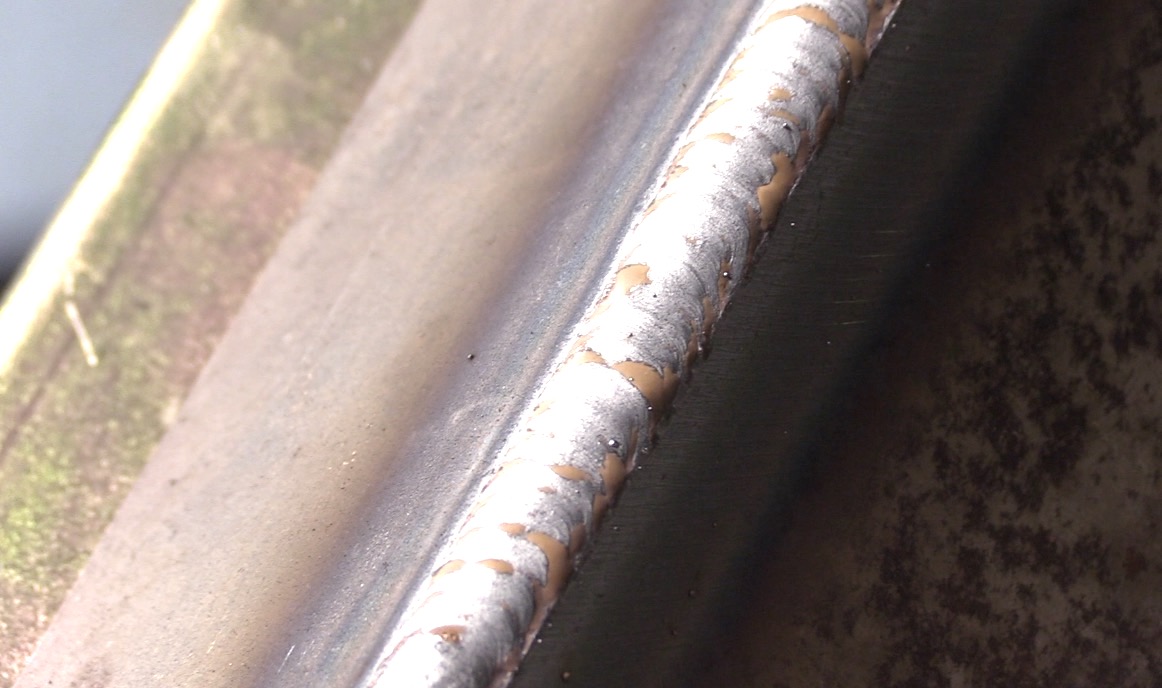
Beginning with a 1/4" outside corner joint in flat position, I set the Miller Multimatic 220 machine to some settings I have seen other really good welders use to get the mig like tig stack of dimes look on outside corners.
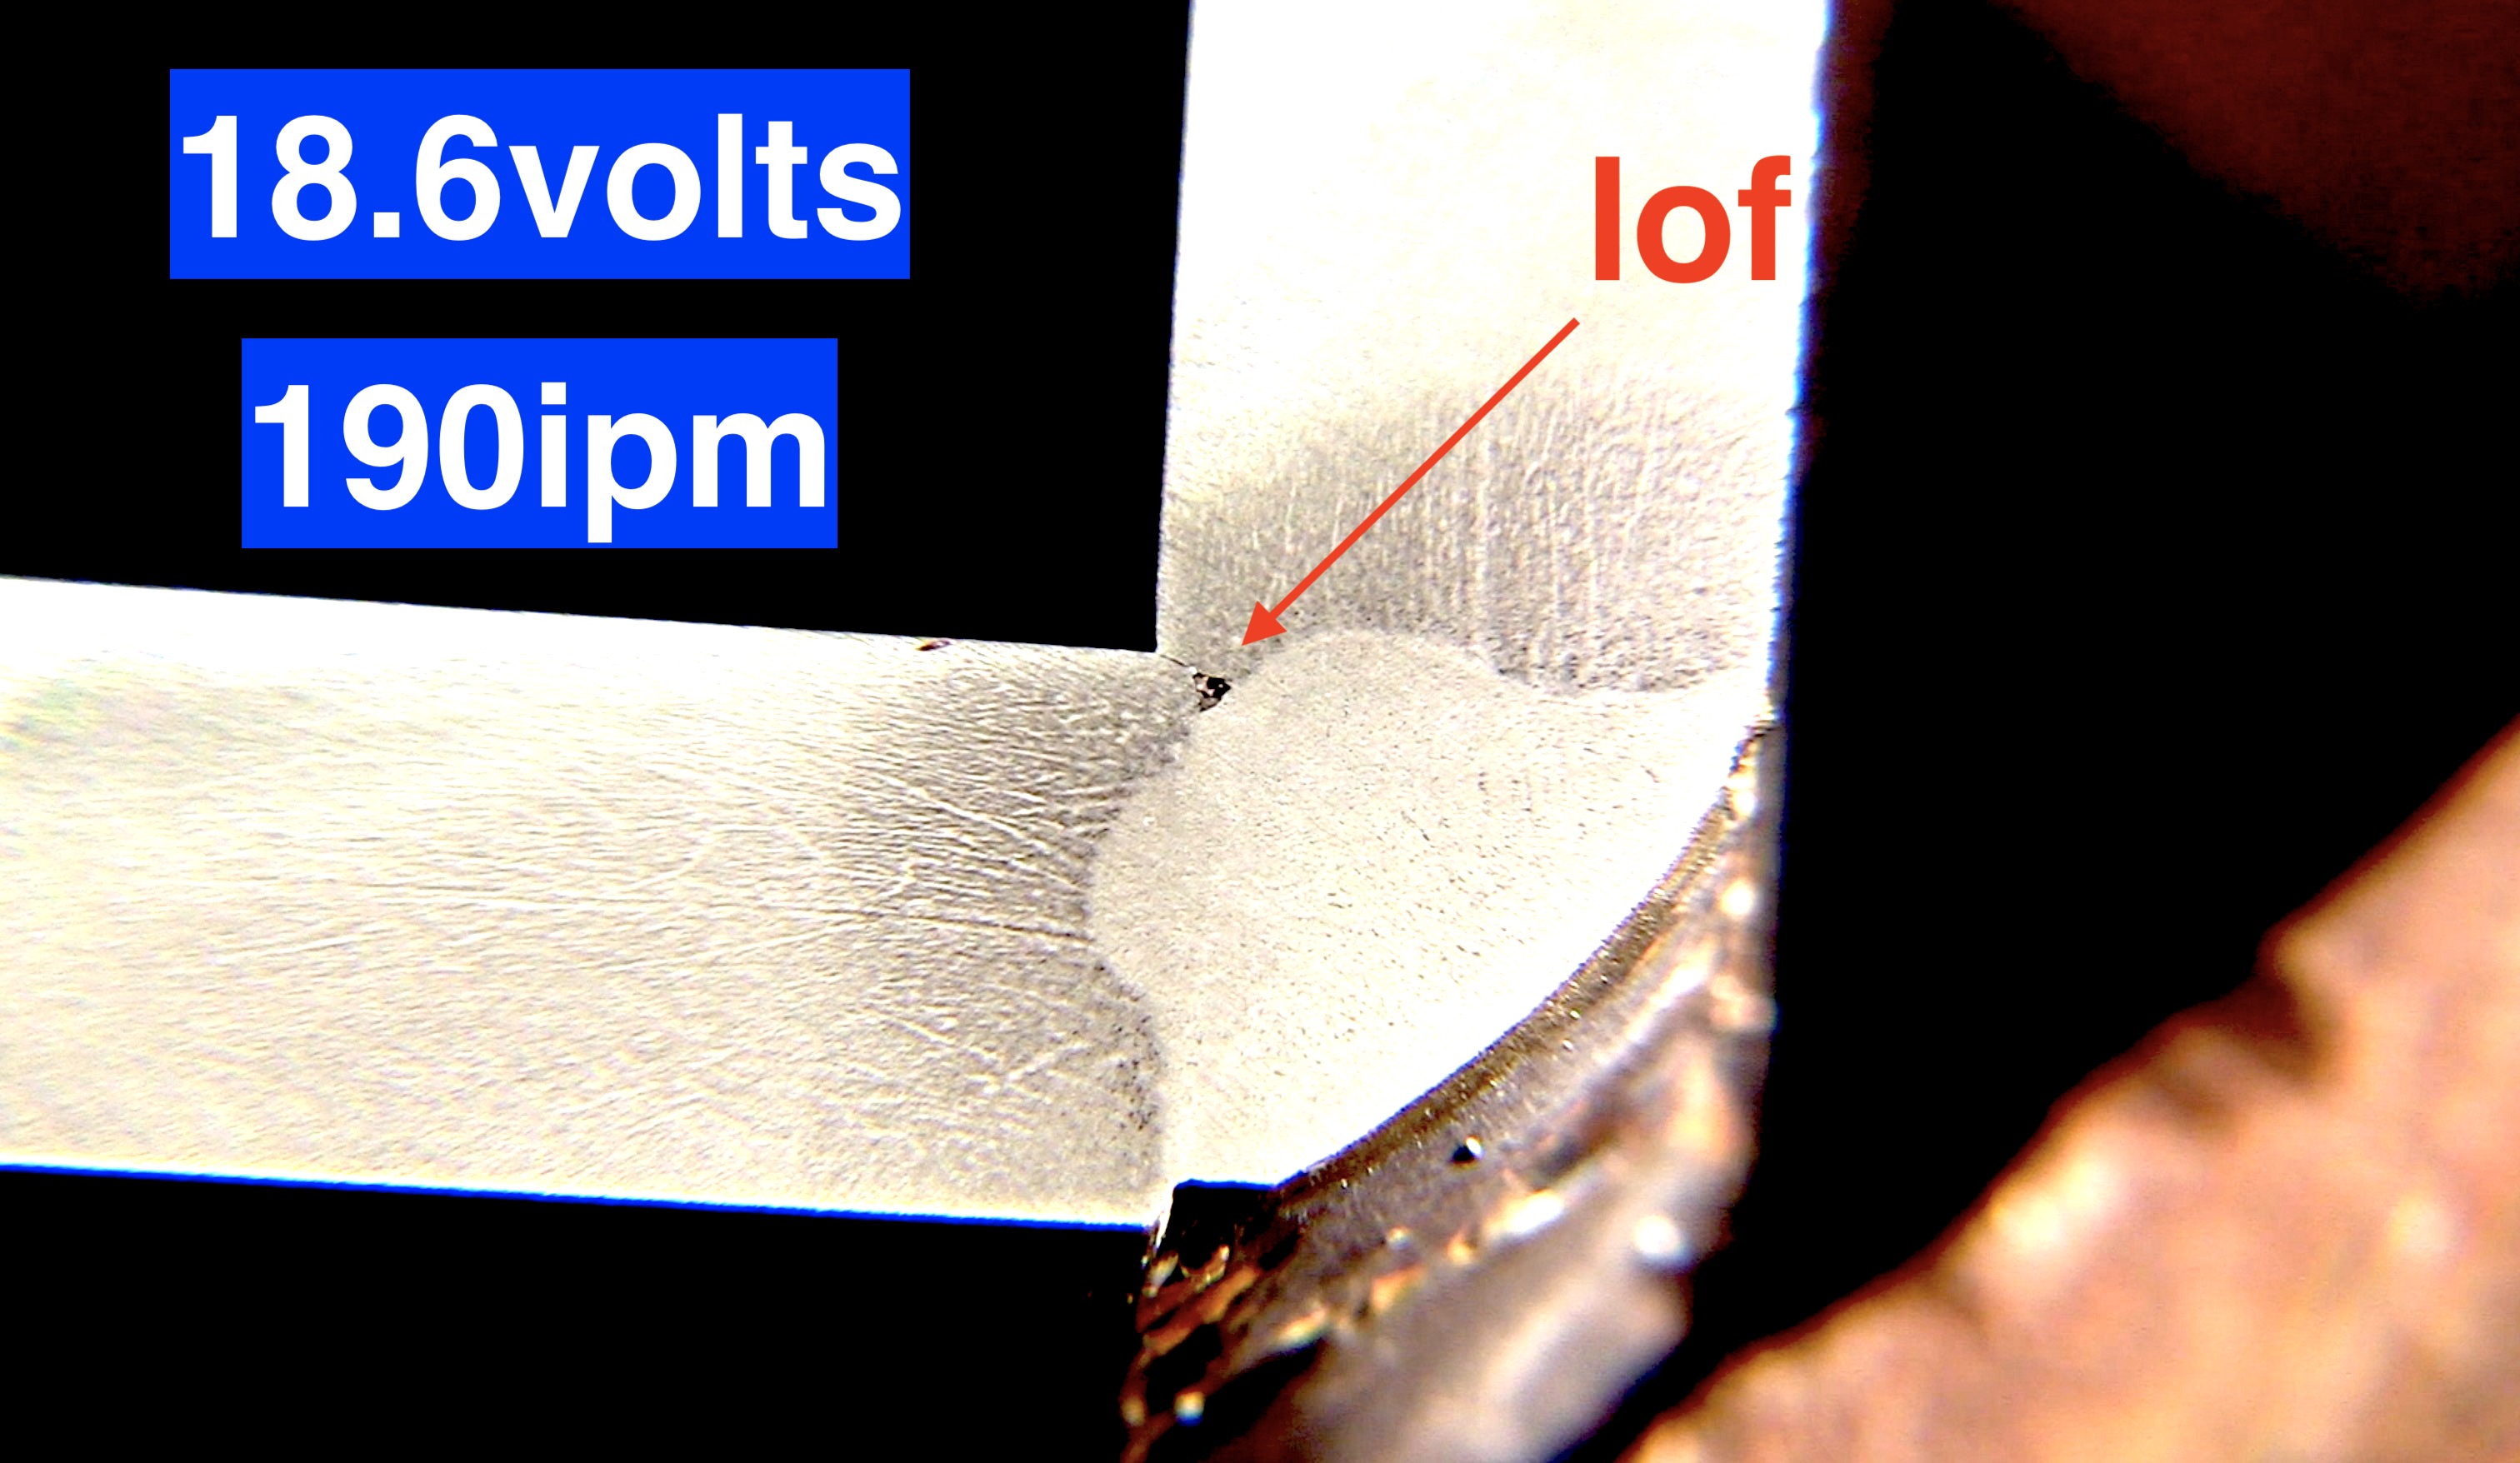
Settings for this were 18.6 volts and 190 inches per minute of wire speed using .035" ER70S-6 wire.
Using a low wire speed like this really slows travel speed and a lot of motorsports fabricators seem to like this for a couple of reasons:
- It creates a look that customers have come to expect
- it slows the travel speed which helps a lot when welding round coped tubing joints where the welder has to constantly reposition to maintain a decent gun angle.
I'm just not good at "mig like tig"
I have never been able to duplicate the results of some of my friends like Paul Brinegar (ZTFAB) and Joel Bushman (overkillracingandchassis)
(And By the way, We interviewed both of these fine fellows on the weldingtipsandtricks podcast where they explained how they the "mig like tig" technique.)
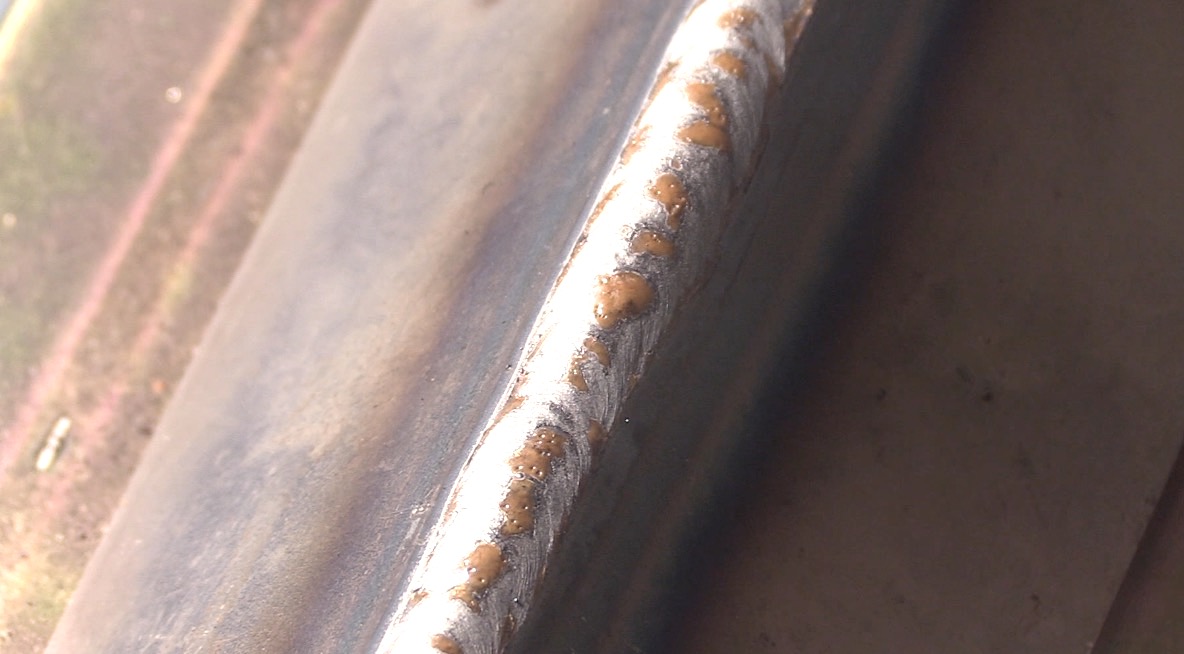
The one thing I noticed about using the lower wire speed setting of 190 is travel speed was super slow.
And since travel speed is a big factor that determines heat input, that is always something to consider.
Penetration using these settings was less than perfect...While there was some decent penetration into the members, it didnt reach the root and there was not much depth of fusion at the toes of the weld.
I think this could definitely be caused by me not having mastered the technique... but the test results kinda are what they are.
I might have seen different results at different areas if I had made more cuts or If I had more practice at this technique.
Using Miller Multimatic auto set settings
I accidentally selected 3/16" thickness for 1/4" but for an outside corner joint, It seemed plenty hot anyway
The Miller Multimatic Autoset had me at 19.6 volts and 342 ipm and travel speed was way faster and of course the puddle was much hotter.
And as would be expected, penetration is better than with the lower wire speed settings...

3/16" 2F outside corner welds
I also had some 3/16 thick steel so decided to use the same settings on 3/16" thickness in a slightly different posiiton. 2F instead of 1F.
Not much difference at all in the two but it seemed like a good idea at the time.
And after I did the outside corner welds using the 2 different settings, I used the auto set setting for 1/4" to weld the inside corner.
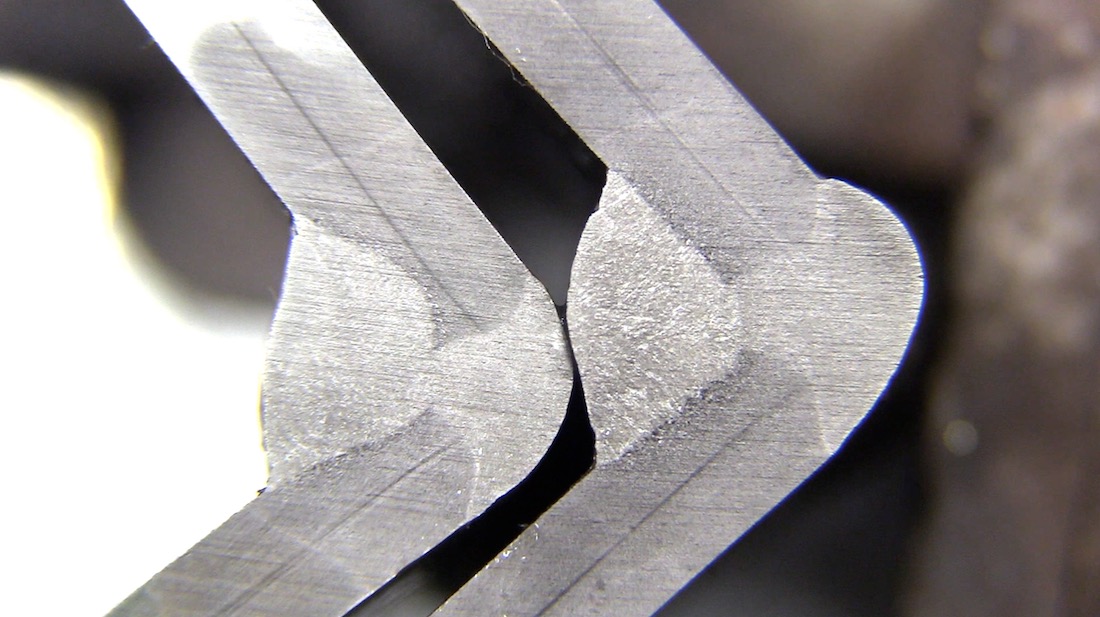
I cut the welds and sanded down to 400 grit and then etched the samples using a passivation solution for stainless steels.
Conclusions
I really wasn't trying to prove anything here but rather just trying to learn and share my results.
I have never really needed to make a mig weld with the "mig like tig" appearance so I have always used the higer wire speed settings to get the job done quicker.
But I think what I learned is that if I were going to use really low wire speed settings, I would need a lot more practice and tests to perfect the technique.

Would you like to get free welding videos in your inbox every week?


Tig FingersThe Real and Original TIG Finger® and XL model
Stubby Gas Lens and Pro TIG kits
2% Lanthanated, CK LaYZr, Purple, more
Our Weldmonger Stubby Gas Lens kit is the Best


