Take advantage of our Free Welding Guides loaded with Video links

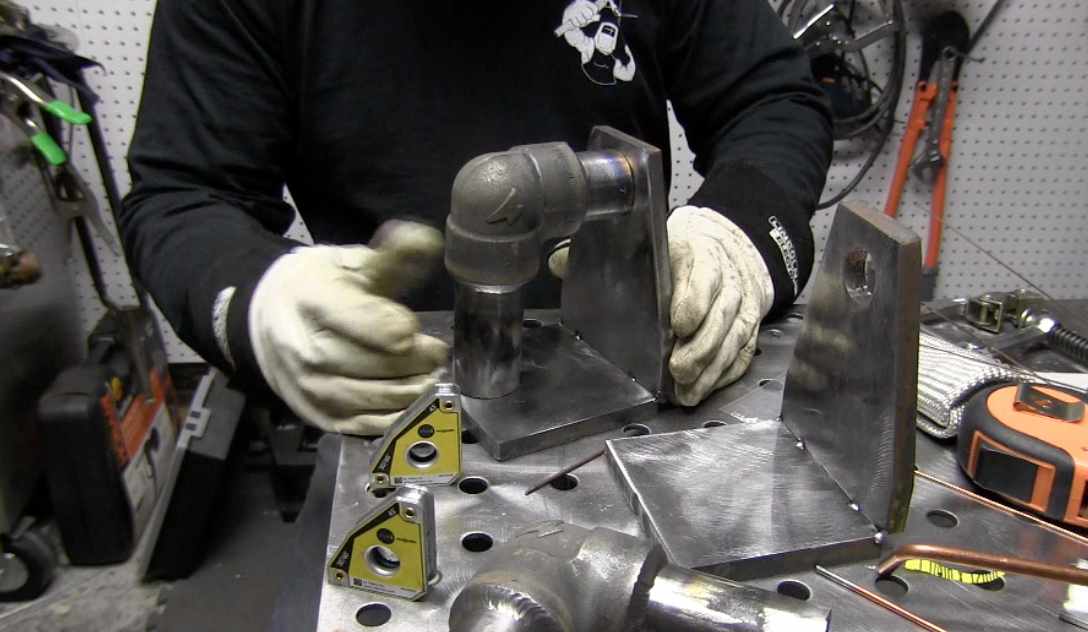
Socket Weld Bookends

What does a socket weld have to do with a Bookend?
Well, a while back, I ordered some cheesy bookends that were shaped like hands.
My wife thought those hand shaped bookends were the tackiest thing she had ever seen and she intercepted them...sent them back to Amazon.com before I even got to use them.
She ordered me some plain light duty sheet metal bookends and well...they kinda suck....They are flimsy and wont hold my heavy welding books at all.
part 2 socket weld bookends
part 1 socket weld bookends
click here to visit the WeldMonger store
So in the spirit of Overkill, I decided to make some heavy duty industrial style bookends using 1/2" plate and 1-1/4" sched 40 pipe, and some socket weld fittings.
Because There is no kill like Overkill!!!
And even though it has been 25-30 years since I have done socket welds, I have done quite a few of them in my day.
So after being a bit rusty on the first one, I started feeling things come back to me.
I kinda wish I had more fittings because I think after about 10 welds, I might be slightly above average again...lol.
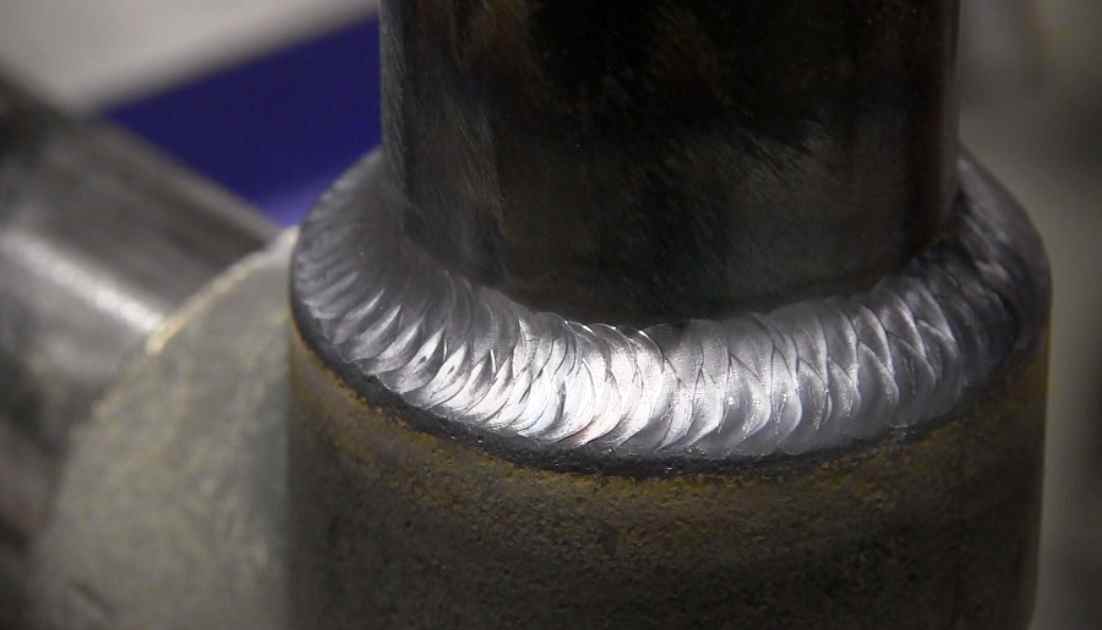
Why do socket fitting welds need a gap?
A quick google search for "socket weld failures" is quite eye opening.
B31.1 and B31.3 pipe codes require a gap in socket joints.
approx 1/16" gap is what I have seen specified in most code books.
the reason is that if no gap is used, its very easy to develop a crack while welding.
In addition to that, there is residual stress in a socket weld joint that is welded without a gap.
There needs to be a bit of room for the weld metal to shrink. That is the reason for a gap.
If you have ever done work for a machinist where they pressed a round part all the way to the bottom of machined hole, you may have encountered cracking at the beginning of your first bead.
Same thing...
With a stud, or axle press fit and bottomed out in a machined hole, There is no room for weld metal shrinkage and with metal getting hot and expanding and then contracting, its easy to get a crack.
Another good reason to leave a gap on socket fittings is just to get everything plumb and straight.
With no gap, it can be impossible to get the socket fitting lined up straight.

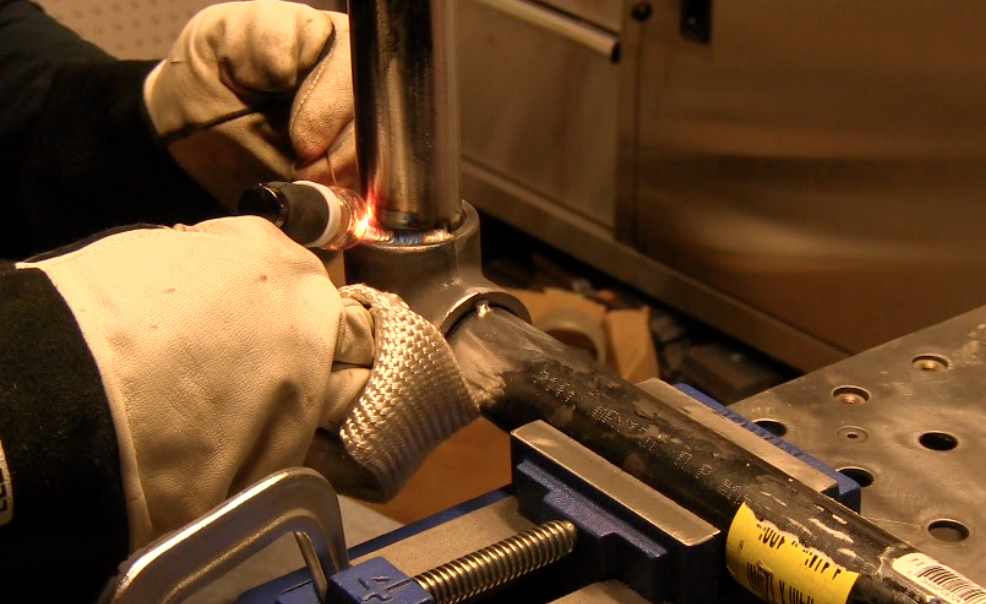
Walking the cup on socket welds
There are times when walking the cup on socket welded joints is just not an option. Mainly because there is other pipe in the way.
but when "walking the cup" is an option, its probably the best technique to use.
For welds done in a tripod vise, walking the cup lets you make it all the way around without stopping.
For welding in the field, often times, an air cooled scratch start tig rig is used for welding socket fittings.
I am using a Lincoln square wave TIG 175 in this video and I am using a foot pedal.
A foot pedal was actually a drawback.
Without the pedal, I would have been able to go 360 deg without stopping and that usually makes for a better looking weld.
see more tig welding videos
Stick Welding with 7024 and 7014
First off, I prefer 7018 over both 7014 and 7014 rods.
But I have one freshly sealed can of Lincoln Excalibur 7018 rods and did not want to open the can just for a set of bookends.
I like to keep a sealed can of 7018 on hand in case I need to do some coded welds.
7024 and 7014 rods dont require being kept in a rod oven.
7024 is a decent rod for laying big beads in flat or horizontal positions but on this day, I was using some Blue Demon 7024 rods and they welded pretty bad. OK how about really bad?
that is why I switched to 5/32" 7014 rods made by Hobart.
At 170 amps they were pretty hot...but once I swapped machines and adjusted the amperage to about 130-140, those 5/32" 7014 rods welded pretty darn good.
De-burring parts in the Tumbler
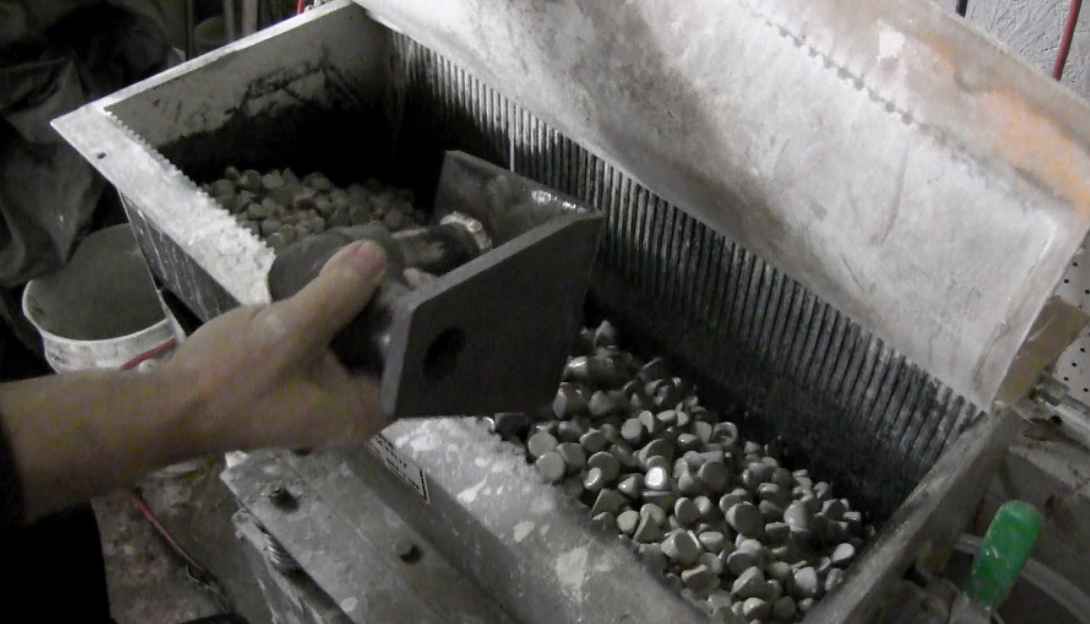
A job's not done until it's de burred.
That is especially true for machined parts.
Machined parts can have really sharp edges and need to be de-burred.
Here is the rub.
If you quote a job of 100 parts and make 100 parts without figuring in time for de-burring, you can take a big hit.
Some parts might easily take 10 minutes or more to de-burr by hand using emory cloth, scotch-brite, or a fine grinding stone.
100 parts times 10 minutes each = 1000 minutes that you just worked and didnt get paid for.
Thats where a tumbler comes in.
My machinist friend has deburred many many parts while he slept.
By putting parts in the tumbler and leaving them overnight, he has been able to de-burr parts without paying someone to do it by the hour.
So I thought I would show how a tumbler works on these bookends.

Would you like to get free welding videos in your inbox every week?


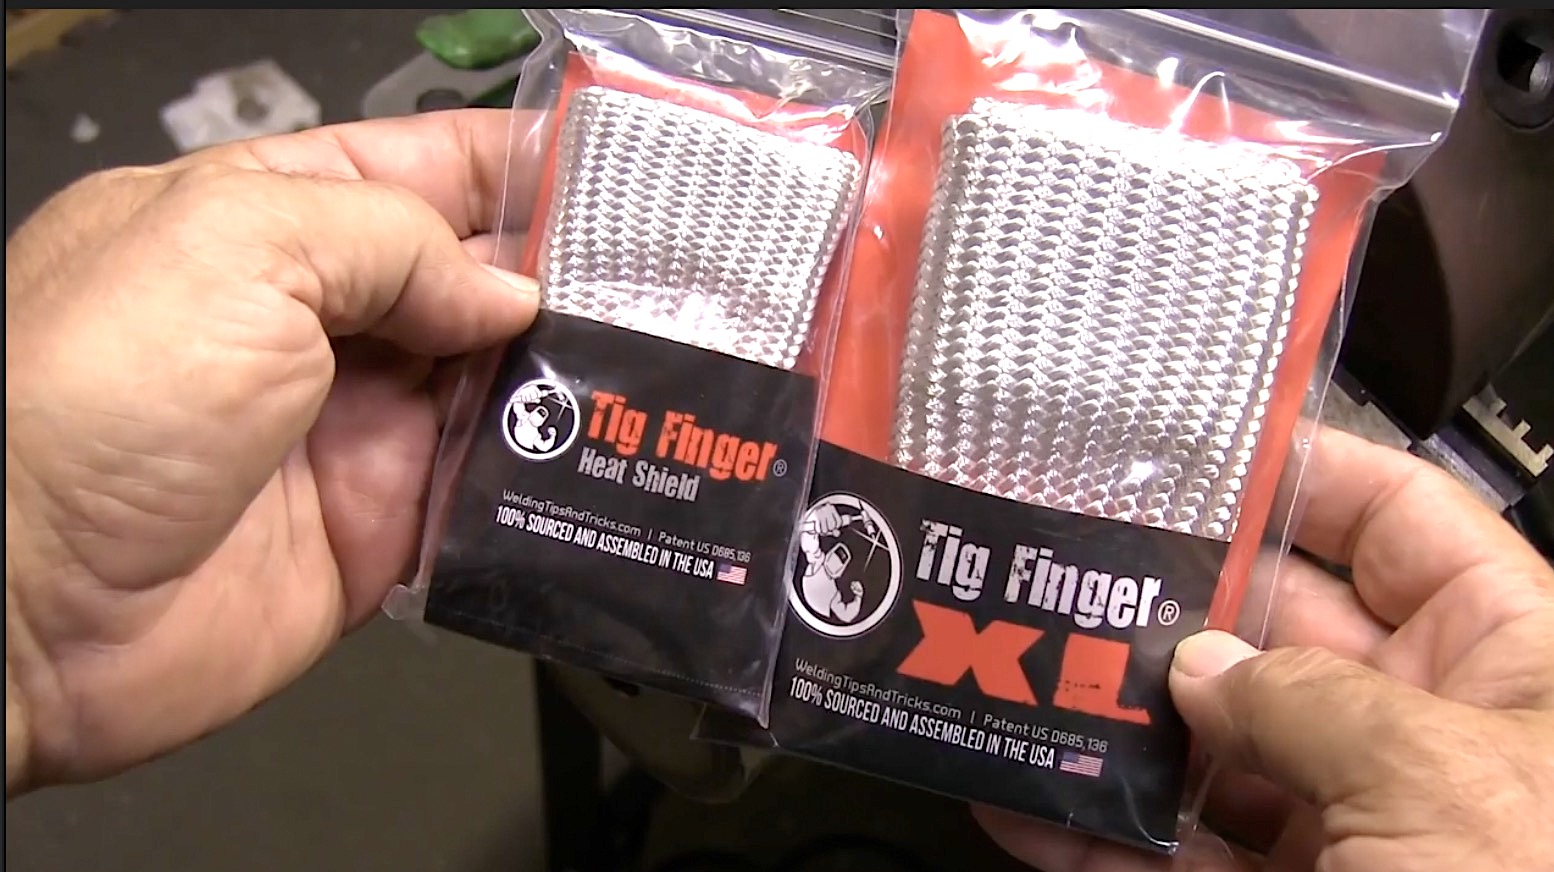
Tig FingersThe Real and Original TIG Finger® and XL model
Stubby Gas Lens and Pro TIG kits
2% Lanthanated, CK LaYZr, Purple, more
Our Weldmonger Stubby Gas Lens kit is the Best


