
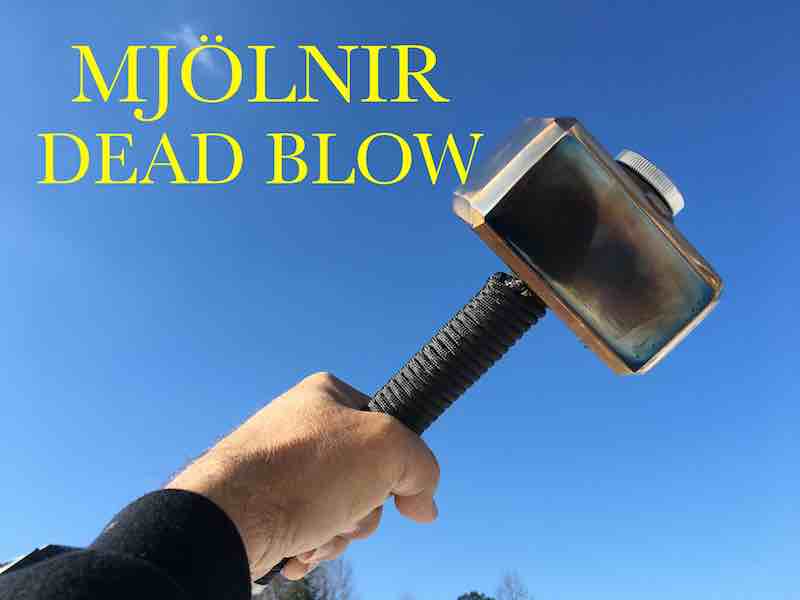
THOR HAMMER MJÖLNIR DEADBLOW BUILD

I set out to make a functional Deadblow Thor Hammer Mjölnir style.
In fact the reason I posted the Tig brazing cube video a while back was in preparing to do this project.
I had some 2" x 1/4" thick cold rolled flat bar on the shelf so I drilled some holes using a hole saw for the handle and bung on the top.
The bung came from an oil cooler kit from a motorcycle aftermarket store and the reason for it was so I could had shot, sand, or some other weighted media to make this thor hammer a very functional deadblow hammer with bronze striking surfaces.

Using a welding postioner

I have 2 welding positioners or turntables.
The first one I bought way back around 1996 because I was doing hundreds of small round parts.
But I had to replace the controller box and for some reason, I am now limited to 1 rpm max speed.
That is great for bigger parts but 2" is around the smallest diameter part I can do on that positioner.
Thats why I bought another one off Ebay that has a much wider range of speeds and I can easily weld something 3/8" diameter now.
So I chucked up the handle and welded it to the bottom hammer head piece using the weld positioner.
Notice I welded both sides and used er70s2 filler rod and not silicon bronze.
I figured a strong weld was important for the handle welds.
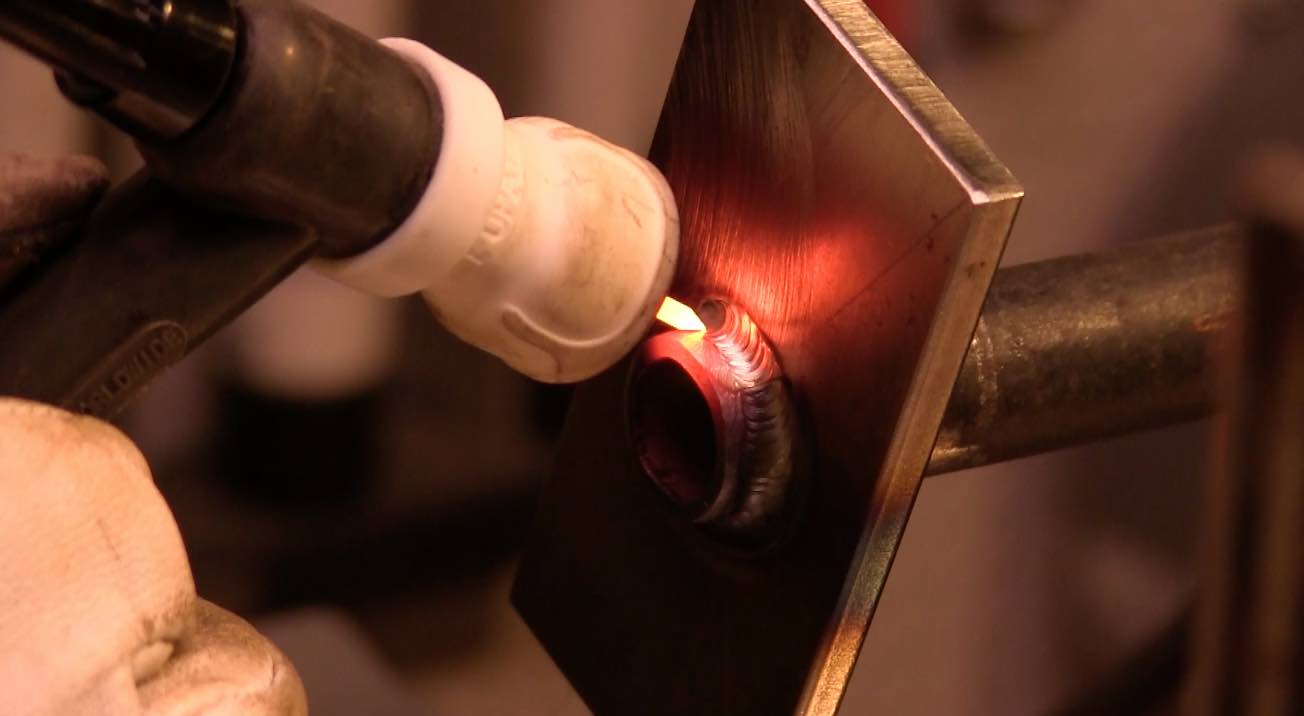
As I started to weld out the hammer head, I realized I forgot to plug the hole in the handle...and since I planned on filling the hammer head with BBs or lead shot, that was a problem.
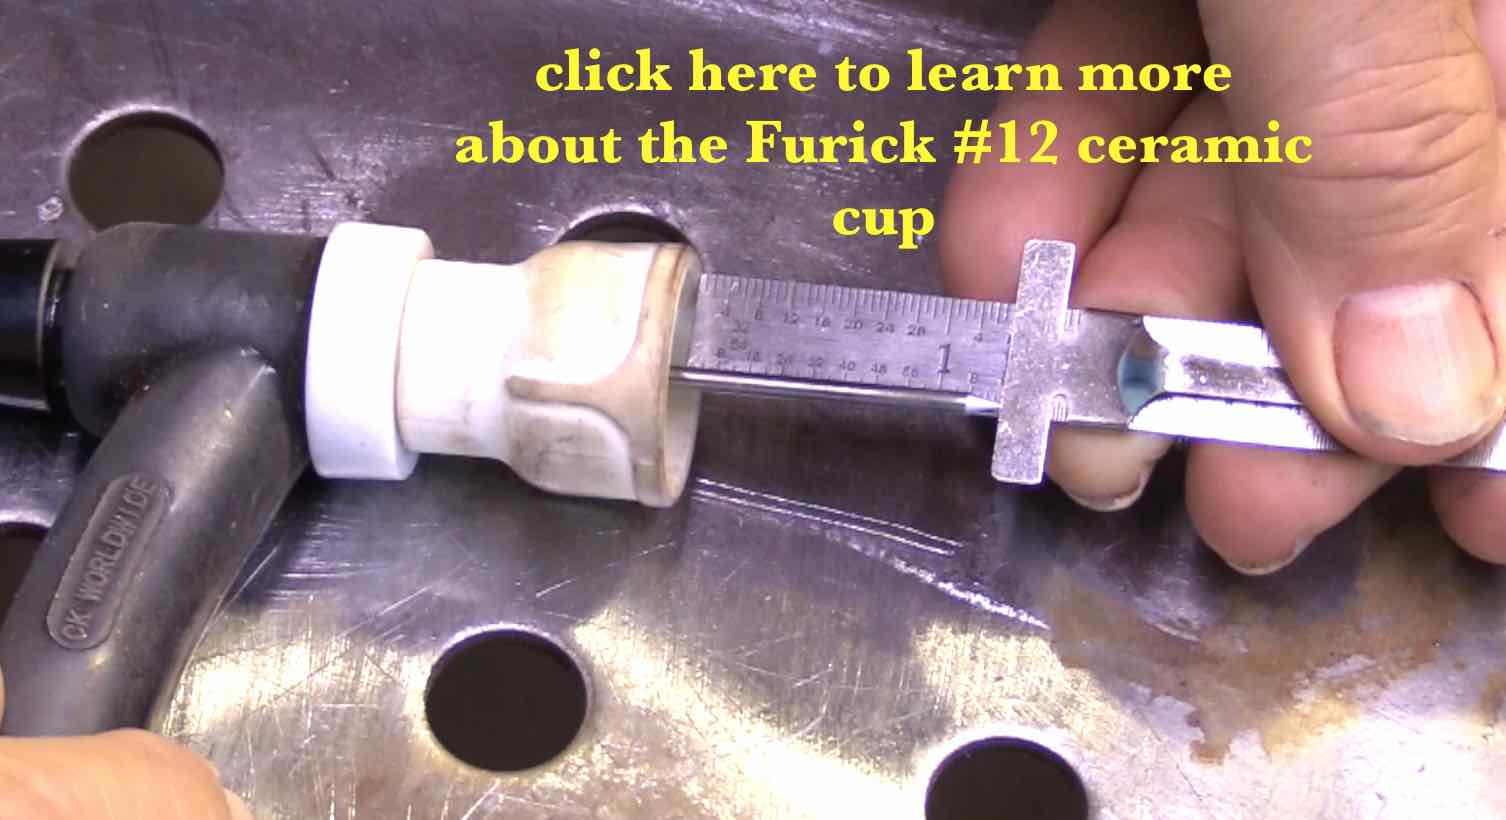
Instead of tearing the head apart, I decided to fill in the 1/2" pipe with weld metal using a Furick ceramic #12 cup.
Its easy to see the benefits of being able to use a really long stickout when you need it.
Silicon bronze tig rod


Silicon bronze tig rod is a super handy rod to have...especially for artsy stuff like this thor hammer head.
I decided to use it to fill in the fillets on the outside corner joints so that when the hammer head was polished, it would give a contrast between the steel and bronze.
I used some pulse settings on the CK tig welder to prevent the silicon bronze filler from sagging.
Once I got the whole thing tig brazed, I sanded and polished all the surfaces on the hammer head and then heat tinted the carbon steel parts blueish and coated them with wd40.
Then I polished the silicon bronze areas to a mirror finish.
I used a regular 1/2" pipe cap that I contoured with a flap disc for the end of the handle and wrapped the handle of this thor hammer with paracord.
Having a threaded pipe cap on the hand will let me store a center punch.
DeadBlow Thor Hammer finished

Would you like to get free welding videos in your inbox every week?


Tig FingersThe Real and Original TIG Finger® and XL model
Stubby Gas Lens and Pro TIG kits
2% Lanthanated, CK LaYZr, Purple, more
Our Weldmonger Stubby Gas Lens kit is the Best


