
- HOME
- TIG WELDING
- Welding Symbols
Welding Symbols on a Tig job
If you are still using the standard TIG cups and hardware that came with your machine or TIG torch, I can just about guarantee you will get better results if you upgrade to a weldmonger® stubby gas lens kit.


There were times in my welding career where I used welding symbols daily. And there were also times where I needed to be up to speed for passing CWI and SCWI exams. But now I notice I am getting a bit rusty because I am no longer in that line of work.
But I shot this video a while back of tig welding a load leveler fixture and I noticed a few things.
...And at first, I didnt think the video was interesting enough for me to share until I noticed a few mistakes on the drawing.
Mistakes on welding and weld symbols are very common so I thought this video would be much more interesting if I talked about that a bit as I worked thru the project.
So along with just working thru the job, cleaning mill scale prior to
tig welding, trying to film some decent arc shots, and using aluminum chill blocks, I also included a bit of
info on welding and weld symbols as they came into play.
You
might go your whole welding career without needing to have a thorough
knowledge of welding symbols, but for some folks, a working knowledge of how
to apply welding symbols is a very necessary skill.
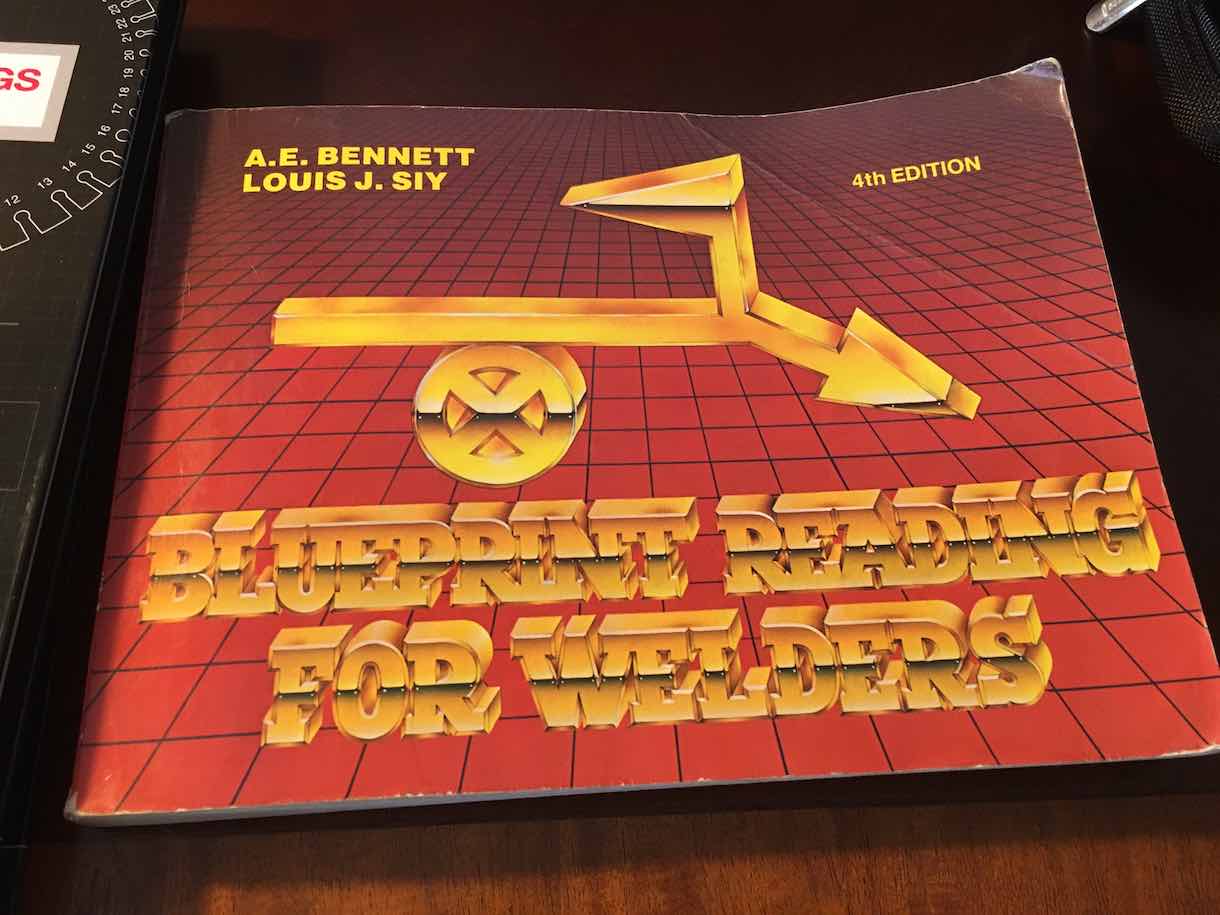
I recommend
the book “Blueprint Reading for Welders” by A.E Bennett and Louis J.Siy
for learning about welding symbols and how to apply them to your work.
I also recommend getting the very latest version of any book on blueprint reading and weld symbols... so that you get the most current information on things like ISO symbols.
Recommended Reading for learning welding symbols
why TIG?

The
part being welded is some type of load leveling device for a specific
aircraft exhaust part that weighs no more than 150 lbs.
I state that fact just because some of the welds are fairly small for a lifting device. Just following the dimensions on the welding symbol
And I am sure some folks will wonder why I didn’t mig weld this part…
The main reason for Tig
Welding was customer preference...so here are the Settings used with a
Lincoln Square Wave Tig 200 welding machine
- 170 amps using a foot pedal ( sometimes full pedal, other times not quite )
- #6 cup using 15 cfh of argon flow unless I had to extend the electrode and then I increased argon flow to 20 cfh.
- 3/32” 2% lanth electrode
- 1/16” er70s-2 and sometimes 3/32”
- DCEN no pulse
I used a #17 air cooled torch that came with the machine but I swapped the hardware out and used a Stubby Gas Lens along with a #6 gas lens style cup.
good thing I did because I needed to extend that electrode out quite a bit to reach a couple of welds.
I usually use a #8 cup for that , but the #6 actually worked best due to the outside diameter of the cup on the #8 prevented me from getting the best torch angle.
Its really surprising how far you can extend the electrode with the right gas lens setup.
The standard setup that comes with a 17 or 26 style air cooled torch is fine for a lot of tig work, I just find that using the stubby gas lens setup makes the torch feel better to me and offers better gas shielding.
Just to be clear, there are also other gas lens kits available for 17 and 26 style air cooled torches that are much larger.
They work very well and for certain jobs like walking the cup on pipe, and for some jobs they are probably a better choice than the stubby version.

Would you like to get free welding videos in your inbox every week?


Tig FingersThe Real and Original TIG Finger® and XL model
Stubby Gas Lens and Pro TIG kits
2% Lanthanated, CK LaYZr, Purple, more
Our Weldmonger Stubby Gas Lens kit is the Best


