Miller Plasma Cutter , Fume Extractor and DIY Downdraft Table

"Dont breathe any more smoke than you have to "
The Drawings are done...Click on the link or image below...you will need Adobe Acrobat Reader
Click on the image below to download the Drawings

What does a Miller Plasma Cutter have to do with a Miller Fume extractor?
... and how does that tie in with a DIY downdraft table?
I traded some services for a Miller filtair fume extractor and I decided to make a downdraft cutting table that would attach to the fume extractor to make even better use of this awesome fume extractor.
This is the final video in a 4 part series on building a downdraft cutting table that attaches to a Miller Fume extractor to make a very important piece of equipment even more useful.
I have placed the earlier videos at the bottom of this page so you wont have to go looking for them.
Now I can use a plasma cutter, a cutting torch, a grinder, or stick or flux core welder and the smoke and dust will get sucked down the table and the fumes will be filtered out of the shop air.
and no more sweeping up all the slag debris from the plasma and cutting torch either.
I used my Miller Plasma Cutter (625 spectrum xtreme) to cut all the sheet metal for this downdraft table project. ...but I got an email from a guy who offered a great tip.
for those that dont have a plasma cutter, and need to make straight cuts, the Freud Diablo Steel Demon Ferrous Metal Blades like you can get from Home Depot work great for making simple straight cuts on sheet metal.
Not everyone can afford a Plasma Cutter or metal shear so dont let that stop you from building this project. If you have a circular saw, and can pony up 40 bucks for a Diablo Steel Demon blade, you are in business.
This is a very useful downdraft table.
I made one like it over 20 years ago and used it all the time to make quick cuts, stick weld, grind, burn paint off of parts, etc.
This one is a bit bigger with an extending handle that serves as a rolling jackstand ...so I am hoping it will be even more useful than the first one.
The videos should give enough info for anyone wanting to tackle this project but I do need to list some things I would have done differently.
The overall dimension is 30 inches square. About 27 inches would be big enough and be easier to maneuver around the shop.
I used square tubing to frame it up but that was only because we had extra sqaure tubing leftover from another job. 1 1/2" angle would have been fine.
I made a mistake on my measuring and cut the sheet metal too short. ...so I decided to weld it inside instead of on the outside. This proved to cause the snowball effect and made everything much more difficult. I would strongly recommend putting the sheet metal on the outside and doing it last so you will have access to all the stuff inside in case you need to adjust something.
The extending handle is going to be nice...but I am not really sure it is worth the trouble I went thru. I first ordered 1 1/4" tubing to use for the runners but it bound up when I tacked it up.
3/4" schedule 40 pipe seemed too sloppy at first but actually worked out to be just right to slide easily without binding inside the 1 1/2" sq tubing....so if you are going to make an extending handle, make sure to make it a sloppy fit with some type of spring loaded ball pin or a down and dirty bolt to hold it in position fully extended or for a push handle.
The dump pan is another place where I didnt give myself enough clearance. It just slides on 2 angle iron tracks and I knew it would drag without any rollers or teflon pads but the last one I built was not that hard to slide in and out because I left plenty of slop. like about a full 1/2" inch. On this unit I only left about 1/8" on each side and it is easy to bind if I push it crooked. I might have to do some massaging with a grinder to get it going in and out more smoothly.
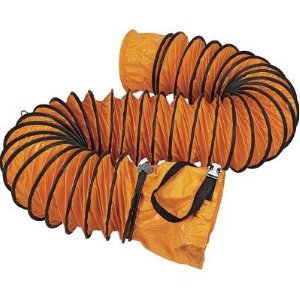
Another thing...i went to a lot of effort to make the slats removable by using a lot of pieces of 3/8" round stock tacked on each side of each slat. . but the truth is , it would be easy enough to tack them in and just cut them out when its time to replace....and also, there are times when you might want to use a clamp under a slat that is welded in to hold something in place. I wont be able to do that with mine since they pop in and out easily. and Finally I know not everyone is as lucky as me to have a Miller Fume extractor....so there is another option. Northern tool has a neat little utility blower that moves over 1500cfm.

someone could easily make the air box to accept this little blower along with flex hose like this...
All in all , I am very satisfied with this project...and with the Miller plasma cutter and Fume extractor...
See parts 1 , 2, and 3 below
see more miller plasma cutter videos
seen enough on the diy downdraft table? go to other welding videos
Would you like to get free welding videos in your inbox every week?


Tig FingersThe Real and Original TIG Finger® and XL model
Stubby Gas Lens and Pro TIG kits
2% Lanthanated, CK LaYZr, Purple, more
Our Weldmonger Stubby Gas Lens kit is the Best


 Subscribe To This Site

