Take advantage of our Free Welding Guides loaded with Video links

More Scratch Start TIG tips Part 2

In this video, I do a very quick review of the last scratch start tig video and show how to use a water bottle to guard the hot connection created when you hook up a scratch start tig using the Adapter 105Z57.
Also, I am welding the second pass over top of an open butt root. Its often called the "hot pass"...but sometimes, the same amperage is used as the root.
Amperage needed for the second pass is determined by several things...
I will list them along with explanations below...scroll down to see them
if you missed part 1 to this scratch start tig playlist, click here

In pipe welding, often times, the root pass is done using scratch start tig.
The goal of the root pass is to completely melt both sharp sides of the bevel in such a way the the inside of the pipe has weld reinforcement that is smooth, uniform, and flush or above flush.
Depending on the application, industry, welding code, and even the welding inspector, the welder might be required to make a root pass that is flush ....or above flush....but below flush is usually not good.
Some weld joints are done using tig for the root and hot pass,,,and then the rest is welded with mig or stick.
scratch start "Hot Pass"
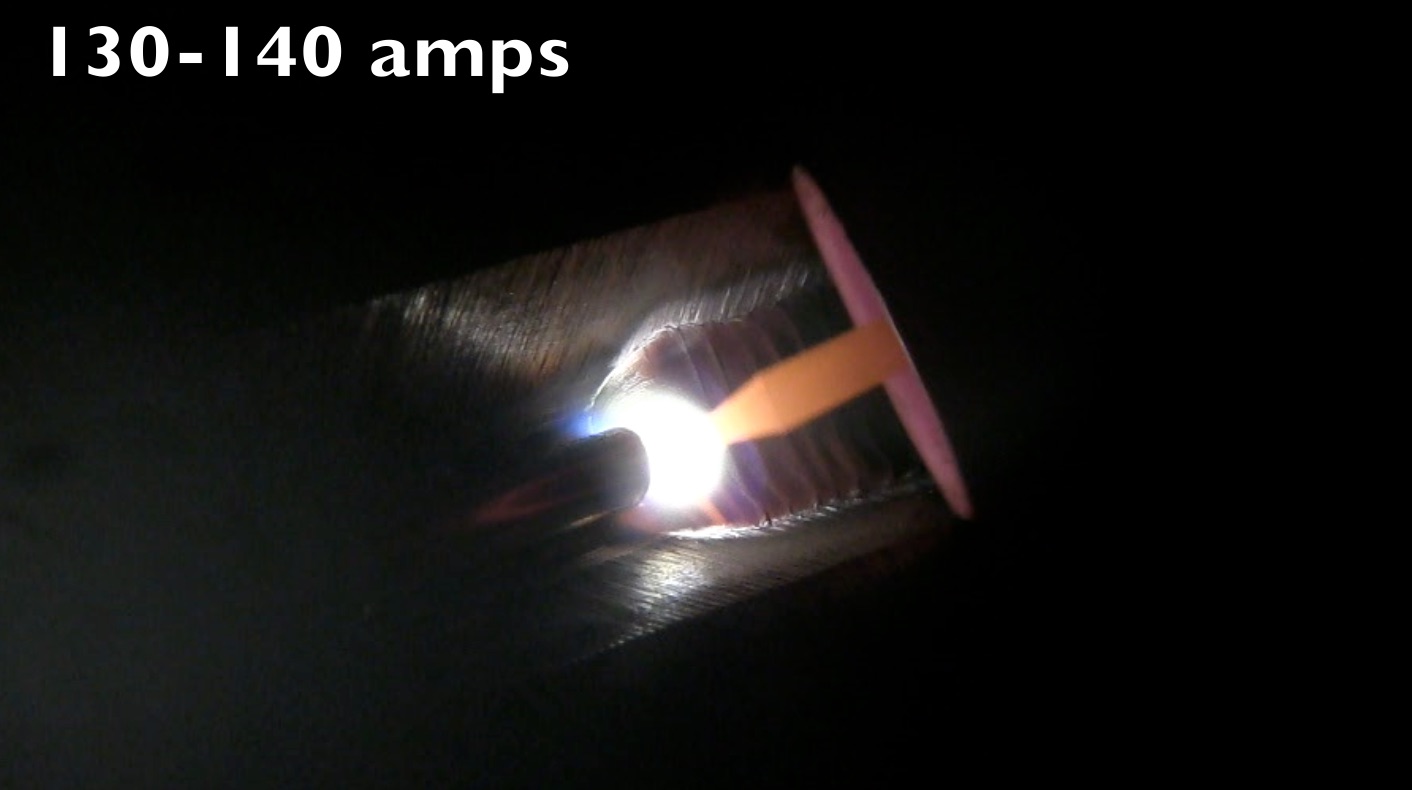
The hot pass in tig welding adds more metal to make it unlikely for melt thru to occur once stick welding is started.
In addition to adding more metal...One of the main goals of the hot pass is to not negatively affect the root pass.
In other words, you dont want lack of fusion between the root pass and the hot pass, but you dont want to melt thru either.
Melting thru often times causes suck back.
Suck back is when the root is remelted and drops below flush...or even below the surface of the rest of the root.
its something that can fail X ray...and inspectors dont like it either.
Here are a few things that affect how much amperage is needed for a good hot pass that does not melt thru or suck back:
- how much metal was deposited in the root pass...if a very thin layer of metal was deposited, the same amperage will probably be enough
- what position the weld is in... for example, more amperage can be used if a weld is done in flat position vs vertical.
- the included angle of the bevel...ASME codes usually favor a 75 degree included angle but there are other joint configurations too. for example, on heavy wall pipe, sometimes a J bevel might be used and that might even required 2 hot passes at low amperage to avoid suck back
- how fast you can travel...if you are proficient at walking the cup, you can probably get away with higher amperages than someone who cant walk it out as fast as you
Personally, I usually play it safe and either use the same amperage as I used on the root...or only slightly higher.
Unless I am able to really get in the groove like in a fab shop where I am welding a whole lot of joints and get really comfortable with the heat.

Would you like to get free welding videos in your inbox every week?


Tig FingersThe Real and Original TIG Finger® and XL model
Stubby Gas Lens and Pro TIG kits
2% Lanthanated, CK LaYZr, Purple, more
Our Weldmonger Stubby Gas Lens kit is the Best


