Stainless Root Technique on 3 inch pipe to flange

- HOME
- Tig Welding Stainless
- Tig Welding Stainless Steel
- Stainless Root
see more pipe welding videos
see more TIG welding videos
Learn more about this affordable tig welder with bonus kit at weldmonger.com

This page is about TIG Welding a Stainless root on 3" pipe.
- pieces are beveled to 35 degrees
- gap is 1/8" (3.2mm) and after tacks were made the gap shrunk.
- ( if you want exactly an 1/8" gap, you need to account for this on stainless pipe by using a wider gap before tack welding)
- Tack welds were made at 90 amps
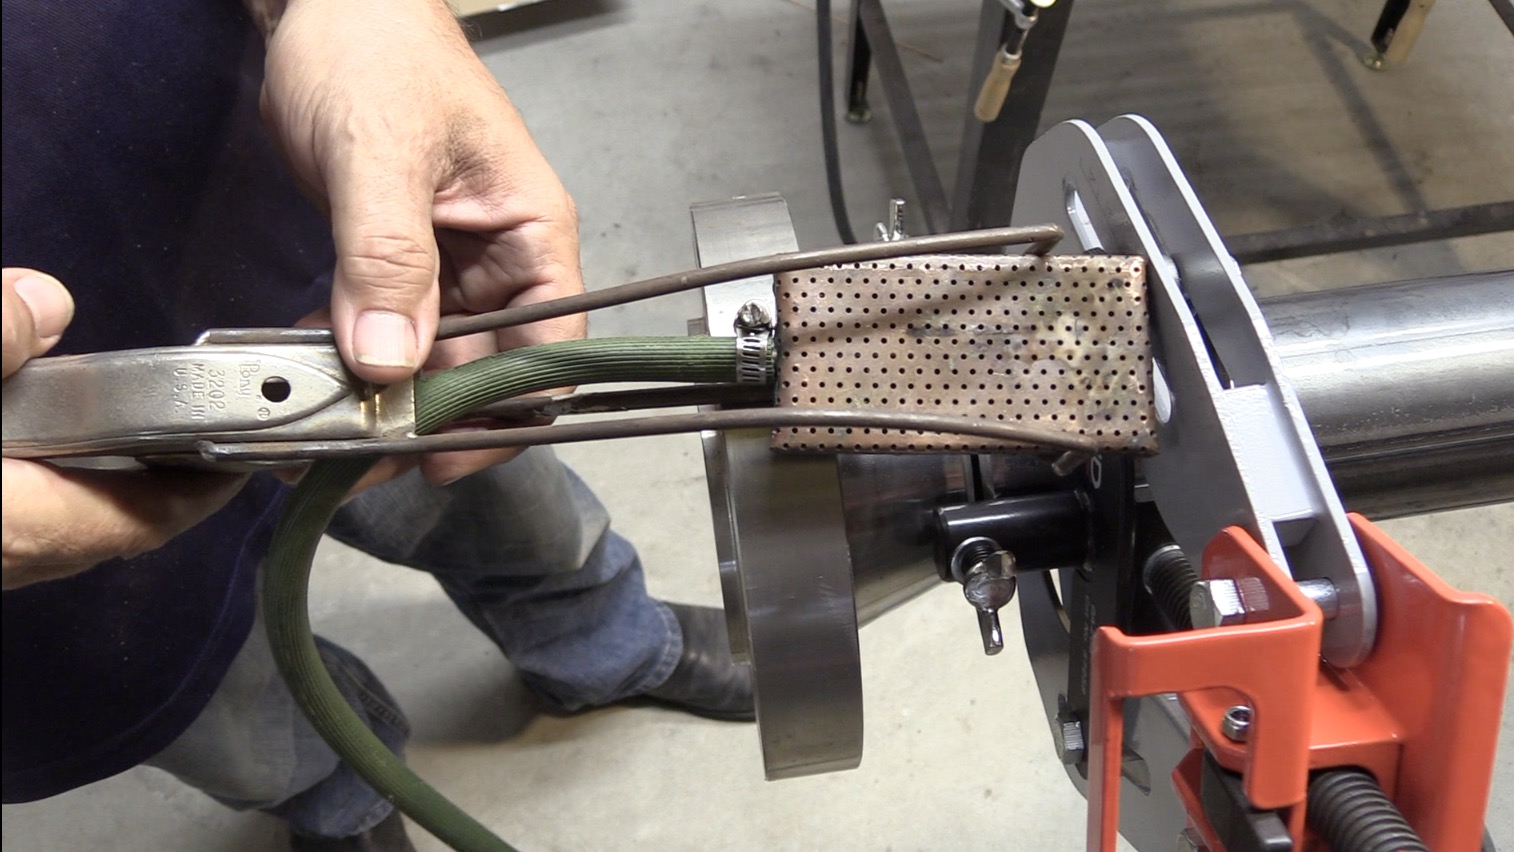
- I used a small DIY purge box to shield the tack welds
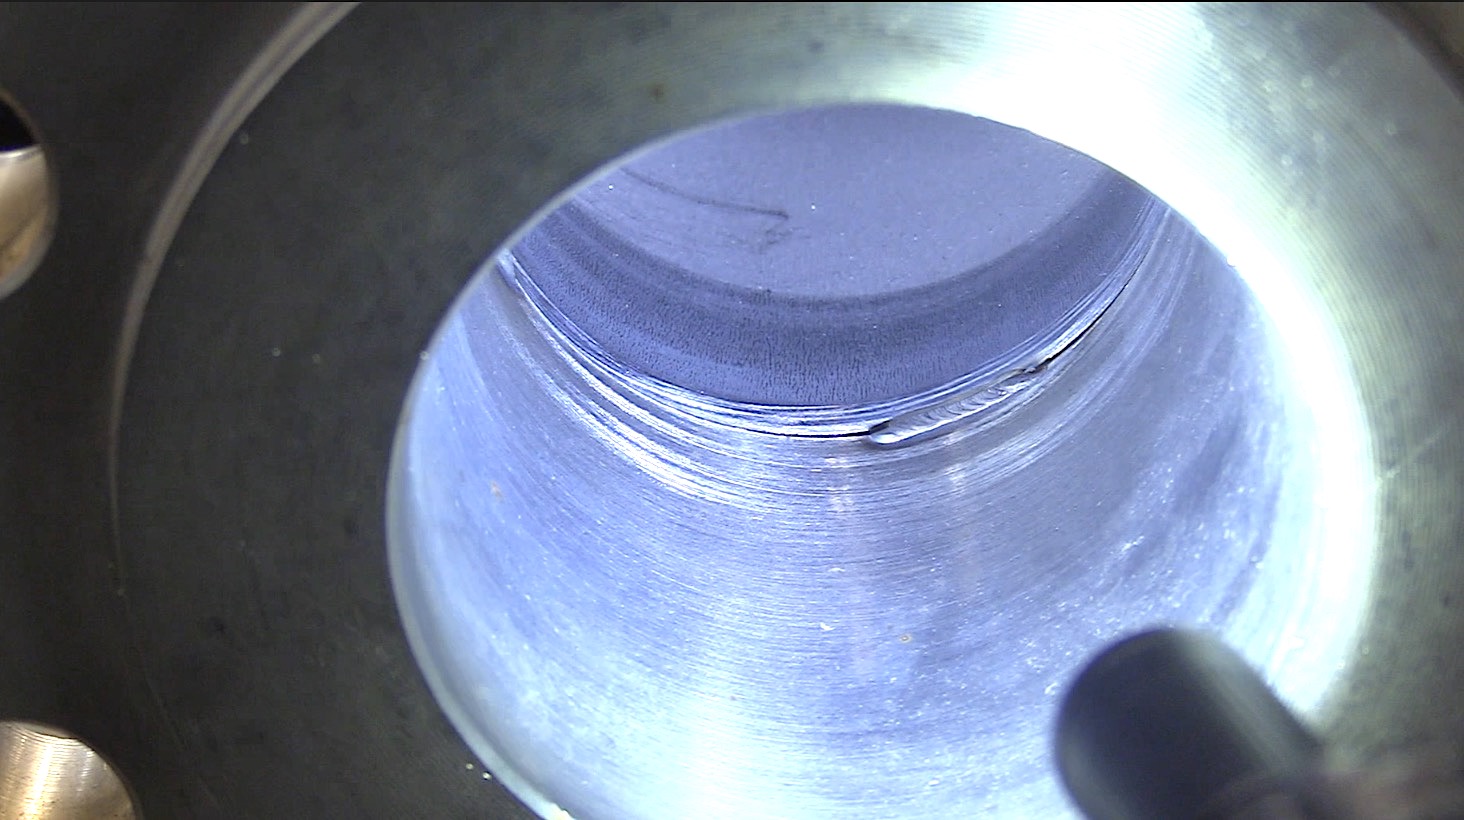
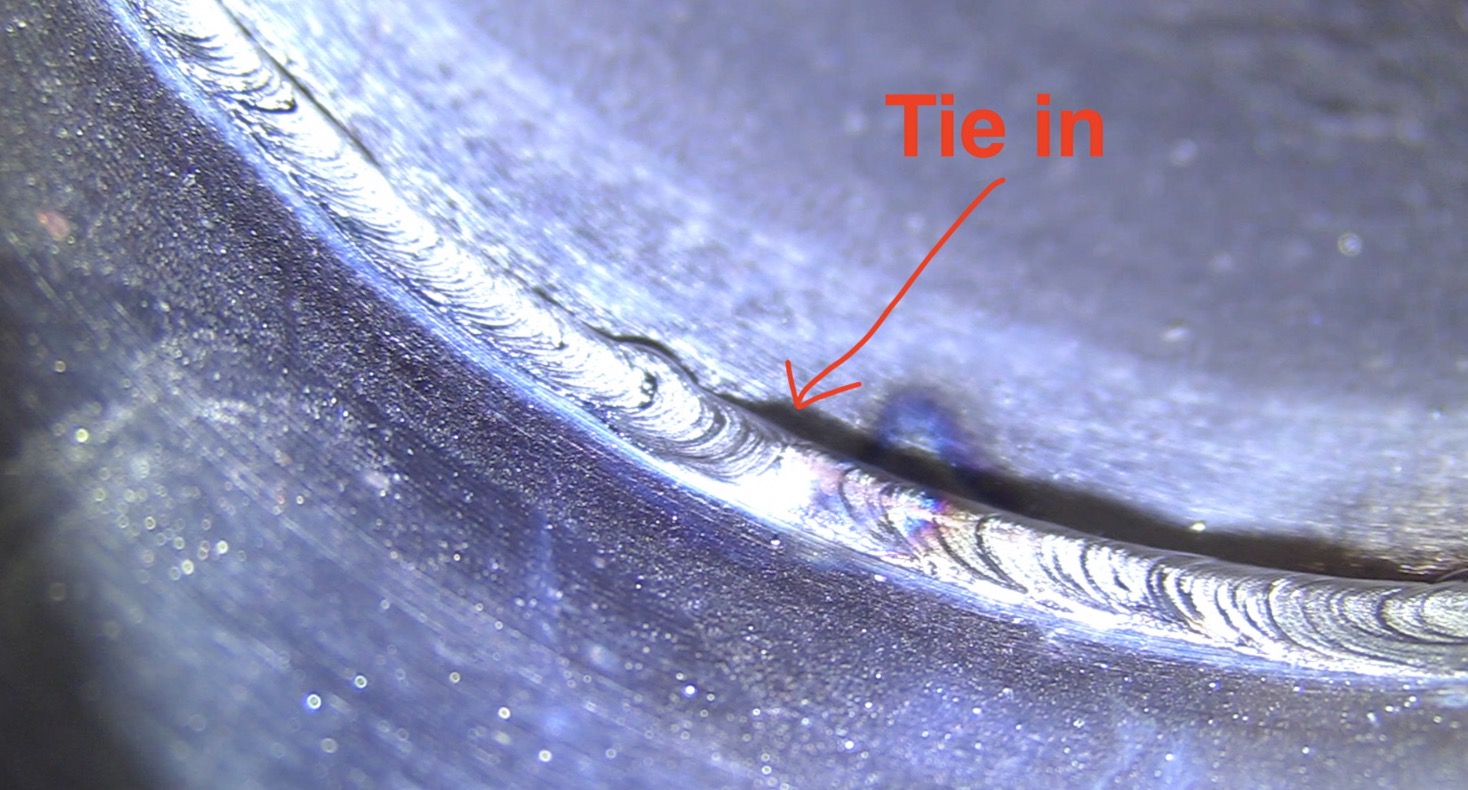
- After tacks were made, I feathered/tapered the ends of the tacks to ensure a full penetration blend when coming off tacks and when welding into a tack weld....except for one end so that I could show a technique where no feathering is needed.
Purge Tips for a Stainless Root
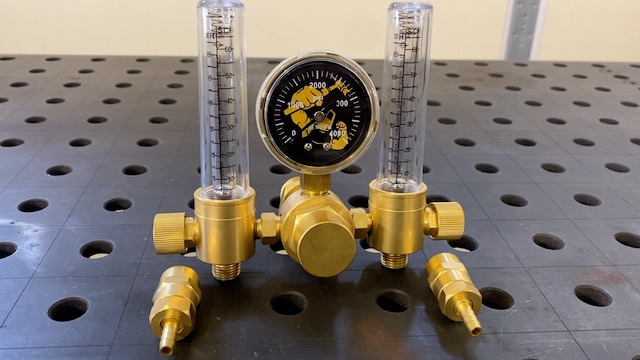
pictured below is the dual flowmeter, you can see it on my store here

In the aerospace welding world, its commonplace to use purge boxes to shield the back side of an aircraft part.
So I used one of these DIY purge boxes for the tack welds so that I didnt waste argon....I set the SPARC dual flowmeter to 25 CFH and connected the purge box to a pony clamp with extensions so that my purge box could reach the joint.
With this method, there is no wait time for a purge and no guesswork on how long it takes to purge the pipe.
I made each tack weld at around 90 amps
Once the tack welds were feathered, I taped the end of the pipe using painters tape.
I taped a clear lens to the flange and and also taped up the weld joint and set the SPARC dual flowmeter to 25 cfh.
To figure out the time it takes to purge the inside of a pipe, there are charts available, there are purge monitors, and there is also the math if you are inclined to go that direction
my cowboy math told me that about 5 minutes was enough at 25 cfh.
I left the purge rate at 25 cfh until I had one last section to weld and then I reduced the flow to 10 cfh and made sure I cut a X vent in the tape to allow pressure to escape once I closed up the weld.
This is a critical step.
If you forget to make a vent hole, pressure will build as you close a root pass weld and will push the weld to below flush inside.
I know this because I have forgotten myself.
It only takes once or twice before you dont forget anymore. cutting out or repairing a weld is much harder than remembering to have a vent hole.
Technique
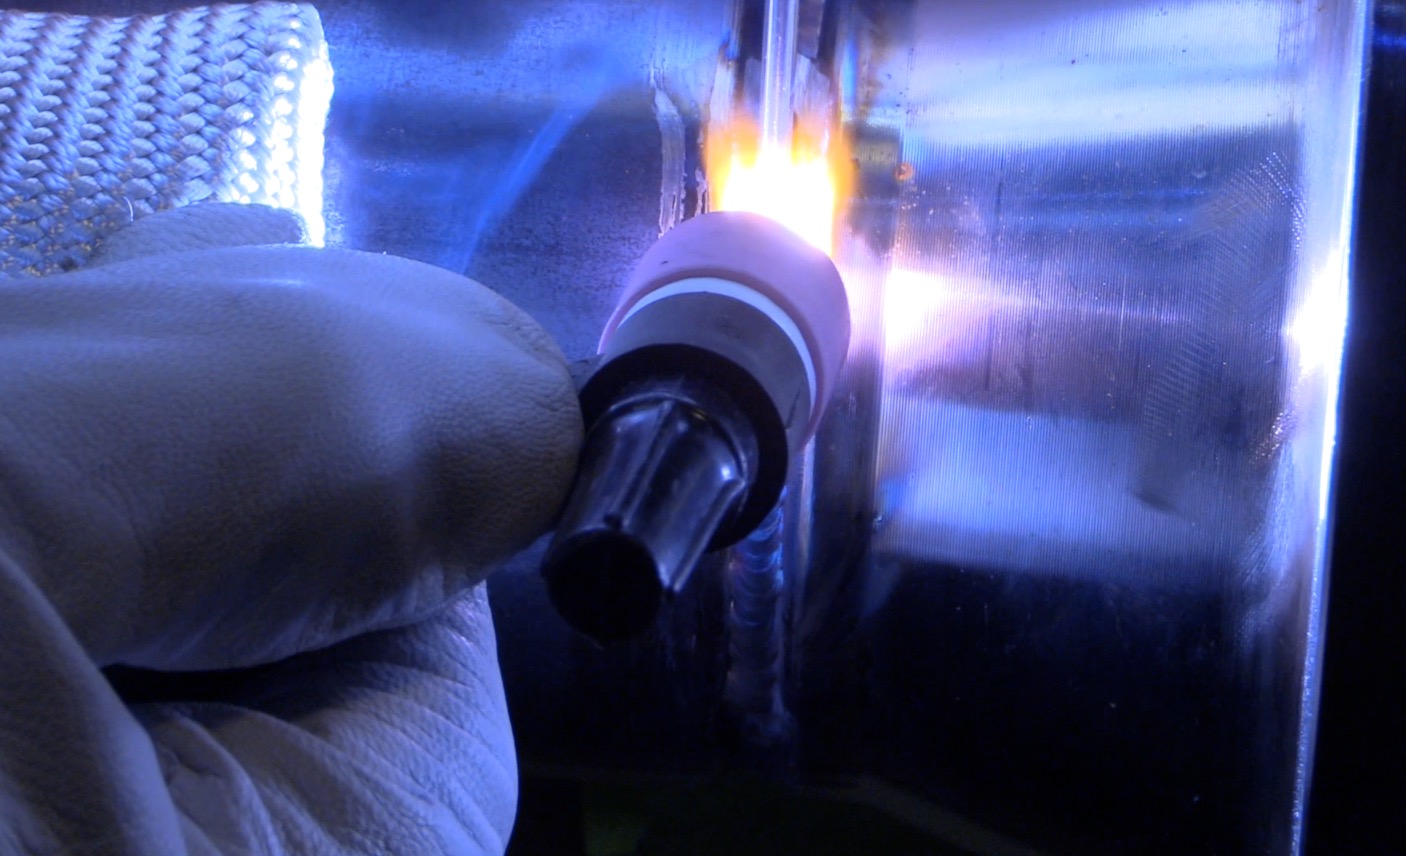
For a Stainless Root pass on pipe, I like to use a forward and back technique.
Especially if I am coming off the bottom at 6 oclock.
That is why I used a TIG Finger instead of walking the cup.Its easy to move backwards and forwards with a TIG finger.
For this video, I welded this pipe out in a tripod vise, so I was able to stay from 9 to 12 oclock but on the bottom of the pipe, the forward and back technigue helps to fight gravity and pushes reinforcement.
You dont really need a lot of reinforcement, but some is nice.
Most pipe codes have limits on the ammount of reinforcement but want the root to be at least flush.
pictured below is the dual flowmeter, you can see it on my store here

You might like these
6g Welding Test part 2
Part 2 in a series of videos with tips for passing a 6g welding test- hot pass

Would you like to get free welding videos in your inbox every week?


Tig FingersThe Real and Original TIG Finger® and XL model
Stubby Gas Lens and Pro TIG kits
2% Lanthanated, CK LaYZr, Purple, more
Our Weldmonger Stubby Gas Lens kit is the Best


