
Tig Welding Aluminum - Intake Manifold Project part2

- HOME
- TIG WELDING ALUMINUM
- How to Tig Aluminum
- Tig Welding Aluminum
In this Weeks Video, I am tig welding aluminum again on an aluminum intake manifold project.
How to you get full penetration on an aluminum butt weld with gaps...and without argon backing gas?
Whats a good AC frequency setting for welding a .063" (1.6mm) aluminum butt joint?
Watch the video and find out.
You might like these
Aluminum Welding Training on your own - just you and your tig machine
The best Aluminum Welding Training you can get on your own - How to Get better at Tig Welding
Welding Aluminum with Tig
Videos on Tig Welding Aluminum and learning how to tig weld


see more tig welding aluminum videos or go to the main TIG welding page
click here if you missed part 1 of the tig welding aluminum intake manifold project
visit the weldmonger store to see tig fingers, gas lens kits, and more...
TIG Welding .063"(1.6mm) Aluminum Sheet with gaps
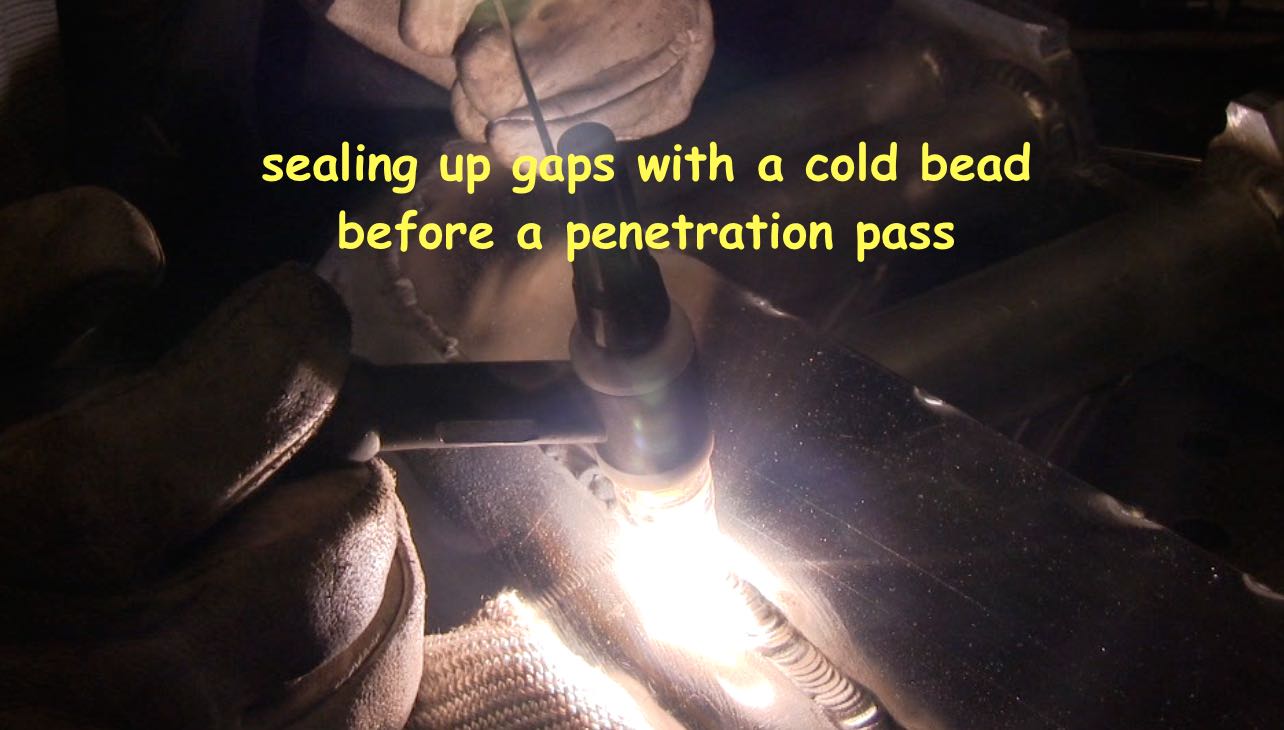
I tried to get a good fit on the butt joints.
I sanded, filed, and was careful to tack weld every inch or so.
Any gaps were very minimal. Under .030" (.8mm)
But I still ran into places where there was some leftover sanding grit, or some small gap, and the joint opened up on me several times.
When that happens, you either have to feed more rod to seal the hole, or stop, let cool, fill the hole, then proceed.
And that can make for a very uneven bead.
So I decided to take a different approach.
I learned a long time ago that if you seal gaps with a very small cold bead...and then let the part cool...that you can go back over it using enough heat to fully penetrate without any issues.
Its hard to get even smooth penetration on the back side of aluminum when there is a gap...even if you use an argon purge. ( I was not purging this part)
But having that cold bead there to conduct heat evenly between the 2 parts being welded allows heat to flow evenly and prevents any keyholes.
Related Pages:
Lincoln Square Wave welding aluminum
tig welding aluminum cylinders
tig welding thick aluminum with a lincoln 175
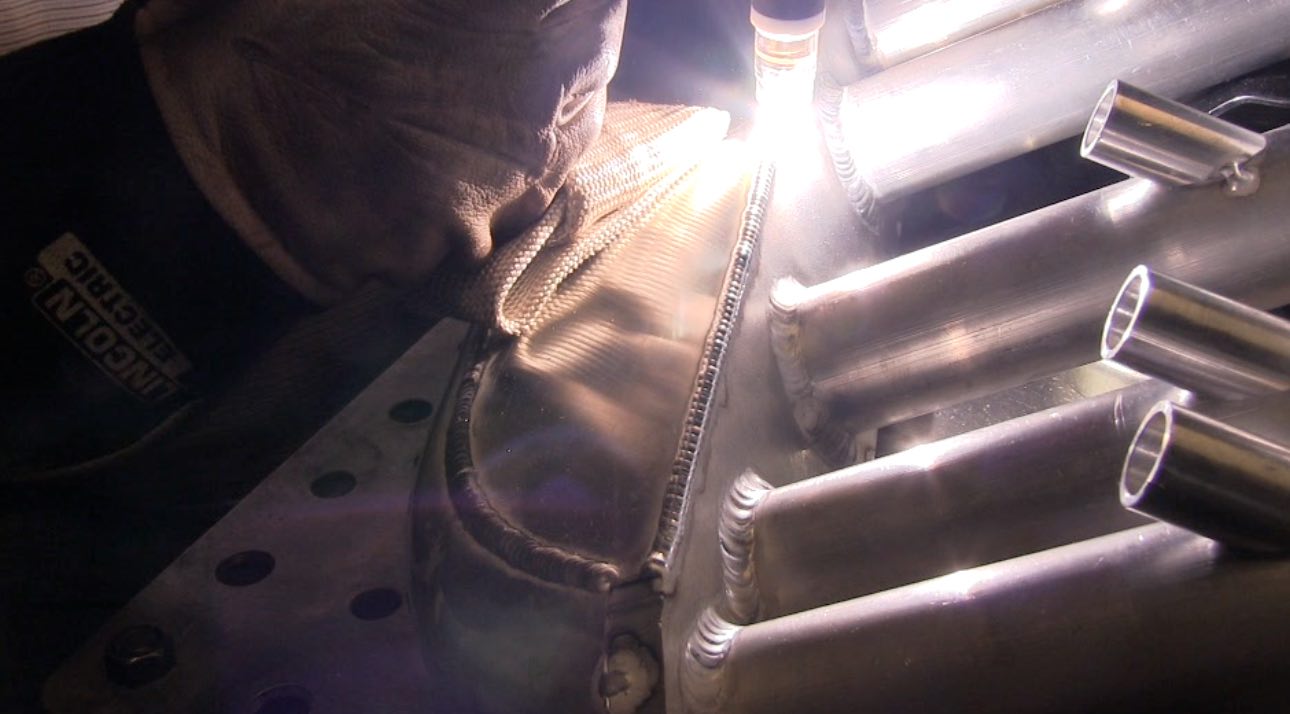
Machine settings for the Butt welds on .063" (1.6m)
On the thicker members, I set AC frequency to 77 hz.
But for the thinner butt joints, I decided to bump that up to 100 hz.
I left the AC balance at 31% cleaning and I used a tapered electrode.
All parts were deburred and wiped with acetone prior to welding.
In hindsight, I guess I would have been better off to change my gas back to 100% argon.
But instead, I sealed the small gaps with a cold bead and then went back over it using the argon/helium mix and and it worked very well.
I still need to align the injector bungs using the fixture I have now.
Once I am sure the injector bungs are located correctly, I will be able to finish this project.

Would you like to get free welding videos in your inbox every week?


Tig FingersThe Real and Original TIG Finger® and XL model
Stubby Gas Lens and Pro TIG kits
2% Lanthanated, CK LaYZr, Purple, more
Our Weldmonger Stubby Gas Lens kit is the Best


