
Tig Welding Tips
- HOME
- TIG WELDING
- Tig Welding Tips

You won't get these Down and Dirty TIG Welding Tips from a Textbook
Preview of the TIG Welding Videos on this page
TIG Welding Carbon Steel Tubing overhead
Best TIG Welding Carbon Steel Video ever IMHO
Tips for TIG Welding Stainless along with Purge tips
Getting better at TIG welding by padding aluminum beads
AC Frequency settings for TIG Welding Aluminum
Tips for TIG Welding 4130 Chromoly
TIG Welding Tips for Stainless tubes
Tig Welding tips... #1. Learn to feed the filler rod by doing it while you watch TV.
Go here for How to Feed the Tig Rod
When you are learning to tig weld or just trying to be a better tig welder, The last thing to come up to speed is the hand that feeds the rod. We all learned how to hold a big crayon in kindergarten and holding a big crayon is not too different from holding a tig torch….so we’ve got that going for us.
But the other hand? the hand that feeds the filler rod... It’s a bit of a slow learner.
A good TIG glove helps. If you have problems feeling the wire with a glove, Try some really soft and thin tig gloves like Tillman goat skin tig gloves or even some woven cotton gloves... Whatever it takes.
FYI...The problem with mechanics gloves is that you cant get them off quick enough if your hand heats up.
"Tig Welding Tips ...happiness is a tight arc!.. "
Learn more about the TigFinger
Click here for Tig Tips # 8--11
Click here for Tig Tips # 12--17
Click here for Tig Tips # 18--22
Click here for Tig Tips # 23--28
Tig Welding tips...
Tip#2. How do I choose what size Tig Welding Rod should I use for the job?
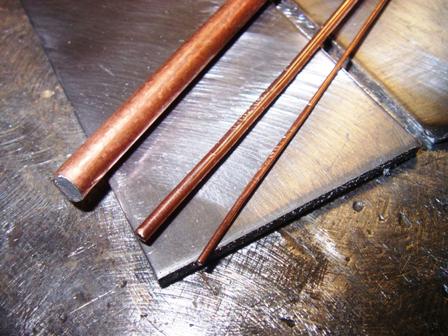
For sheet metal up to 1/8” thick, don’t use a welding rod that is bigger than the thickness of metal you are welding…at least not much bigger.
As an example, just think about using a 3/32 rod for welding .040 metal.
That will just give you a fit.
The amperage is low and the weld puddle needs to be small in order to prevent blowing a hole…and then when you dip the rod into the puddle, the rod is a big heat sink and sucks the heat right out of the puddle making it hard to maintain a consistent size bead.
But Beginners should probably not be practicing on really thin metal.
If you are a beginner you should be practicing on 1/16" to 1/8 " thick metal, and the bigger the rod, the easier it is to feed. For 1/8 " metal, Use larger diameter rods (1/16"- or 3/32”)
So here is the rule….thin metal, use a thin rod
For Thicker metal, use a thicker rod.
This might seem like a no brainer, but I have answered a lot of questions like this about the rod melting before it gets to the puddle. If torch angle and arc length are right, its usually the rod size.
for more tig welding tips...keep scrolling
Tig Welding tips... 3. TIG Torch angle should only be around 10 degrees or less
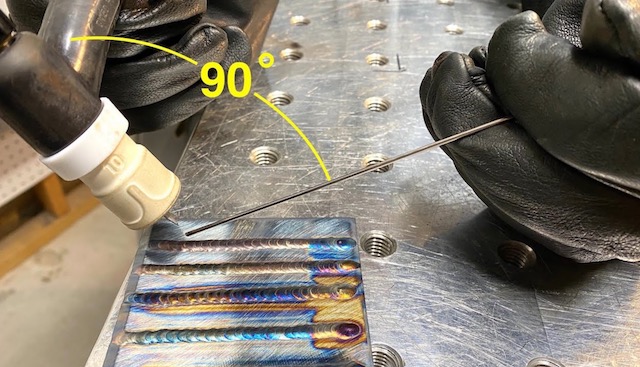
Ideally, torch angle should only be around 15 degrees or less. Too much torch angle will deflect the heat and melt the rod before you ever get it into the puddle. This causes the rod to ball up and blob into the puddle. That’s bad. You don’t want that. You want to slip the filler rod into the puddle so that you can get a consistent bead. There are exceptions to this…like when you are using a lay wire technique and leaning the torch back while you walk the cup. But if you are dipping the rod in the puddle, too much torch angle usually is not a good thing.
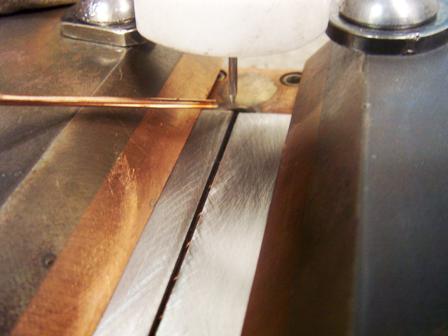
But good news, torch angle can be very forgiving as long as your arc length is tight enough. (arc length should be less than diameter of electrode used)
Lay wire technique using a lot of torch angle
Tig Welding tips... #4. If a ball forms on the end of your rod when welding you are doing something wrong.
It is usually one or more of these things:
• Too long an arc… • Too much torch angle • Not enough amperage for the rod size • Bad filler rod angle • Or some combination of all of these things.
The 2 things I see most often with new learners are too long an arc AND too much torch angle. A long arc sets TIG welding back a few decades because it’s more like gas welding with an oxyfuel torch. The heat is not concentrated and you get this big heated arc plume like you get with a gas welding torch.
Why would you want that?
Your arc length should not be much more than the diameter of your tungsten electrode. I know that’s pretty close and if you get too close you will be grinding electrodes more than you are welding. But if you want really good welds, you need to use a tight arc. Torch angle is the other thing…we already covered it in TIG welding tip #2.
Tig Weldng Tip #5...2% thoriated tungsten electrodes are mildly radioactive
Word on the street is that 2% thoriated tungsten electrodes are mildly radioactive. They say deer meat is too. No one gets out alive.
Good news though…and it’s not just that I saved a bundle on my car insurance by switching to GEICO..
I have learned through testing a bunch of arc starts and by welding on all different metals that 2% lanthanated electrodes are about as good as the 2% thoriated. I even like the lanthanated a little better for some applications. So if you are scared of thoriated tungsten but you are even more scared of crappy electrodes that don’t work as well, use 2% lanthanated…they are colored blue.
One word to the wise here. The blue ones are not brittle like 2% thoriated electrodes. And they splinter if you try to break them or snip with dykes.
You have to cut or score with a grinder in order to cut to size or cut off a bib blob of metal you don’t want to sand off.
• 2% thoriated is Red
• 2% lanthanated is light Blue

TIG welding Tip #6...Use the smallest tungsten that will get the job done
( that said, a 3/32" 2% lanthanated electrode will do almost everything a 200 amp AC/DC tig welder will do as long is it is sharpened right for the job)
for the absolute best results, it is best to Use the smallest tungsten to get the job done. …within reason. Another way of saying this is don’t just use a 1/8” electrode for everything.
There are jobs where a 1/8” electrode is great like for welding 3/16” thick aluminum.
But what if you are welding on the edge of a .030” turbine blade? A .040” electrode will be plenty to handle the 15 amps and will give much better starts than even a 1/16” electrode.
Too large an electrode can cause an erratic arc and contamination…and A bad start where the high frequency tries to arc up inside the cup and off the side of the tungsten can easily melt off a thin edge and scrap an expensive part.
2% thoriated or lanthanated tungsten electrodes hold up at high amperage better than most all other electrodes. When welding at higher amperages, often times you can use one size smaller electrode by using 2% thoriated or lanthanated. And that is a good thing.
Here is a down and dirty breakdown of amperage ranges for 2% thoriated/lanthanated.
For DCEN welding on steels, 1/16" will work in the 20 to 100 amp rage as long as you prep it right. If you are using 20 amps, you will need a needle sharp point to get good crisp arc starts.
At 100 amps, you might not want quite a needle sharp point or you might be putting a smidge of tungsten in the weld. You need a blunter taper. Some charts extend the range to 150 amps for 1/16, but I think that’s way too much. Why not just swap to a 3/32 at that amperage.? 3/32" is good from about 65 – 200 amps. And 1/8" 2% thoriated electrodes are good in the 85 – 300 amp range. ( Drop all these numbers by about 30% for A/C) Using helium mixed with the argon will also change the recommended currents because the arc is hotter with the same amps.
These recommendations are from down and dirty experience and don’t come from a chart. Most charts I have seen tell you a 1/16 tungsten is good all the way to 150 amps…Please.
Keep in mind that for given amperage, larger electrodes will last longer but will be harder to start. On the other hand, Excessive current with smaller electrodes will cause the electrode to melt and drop off. Insufficient current with too large an electrode makes for an unstable or wandering arc and can cause pieces of tungsten to spit when using alternating current.
more tig welding tips...keep scrolling
For a "Stack of Dimes" bead, use a Step and Pause technique Stack of Dimes page
see more tig welding tips #8--11
Tips for Tig Welding #12-17
More tips for tig welding #18-23
More tips for How to Tig Weld #24-28
tig welding aluminum using helium and argon mix
a tip for how to organize tig welding consumables
tig welding pictures

Would you like to get free welding videos in your inbox every week?


Tig FingersThe Real and Original TIG Finger® and XL model
Stubby Gas Lens and Pro TIG kits
2% Lanthanated, CK LaYZr, Purple, more
Our Weldmonger Stubby Gas Lens kit is the Best


